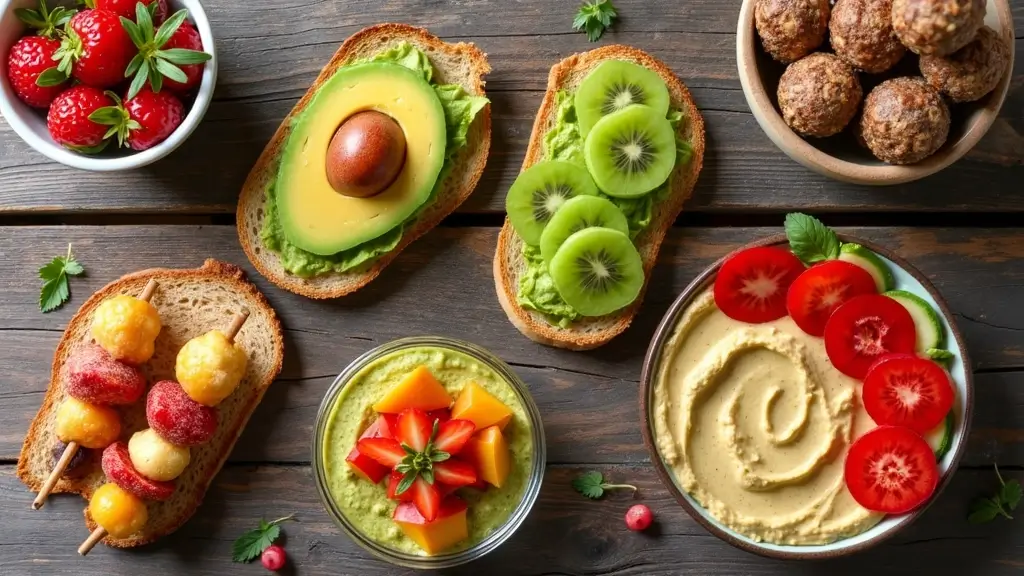
Are you tired of reaching for the same old unhealthy snacks? I get it; sometimes, cravings hit hard, and we need a quick fix. That’s why I decided to put together this collection of 25 healthy snack recipes that are not only easy to make but also downright delicious. The goal here is simple: to help you indulge your cravings without feeling guilty.
If you’re someone who cares about eating well but also loves tasty food, this post is perfect for you. Whether you’re a busy parent, a student on the go, or just someone trying to eat healthier, these recipes are designed to fit your lifestyle. You don’t have to sacrifice flavor for health.
With this list, you’ll find a variety of snacks that you can whip up in no time. Think crunchy, savory bites and sweet treats that can satisfy any craving. Each recipe is packed with nutritious ingredients, so you’ll feel good about what you’re eating. Plus, many of these snacks can be prepped ahead of time, making them perfect for those rushed moments when you need something quick.
So, grab your apron and get ready to explore a world of tasty options. Your snack game is about to get a whole lot better!
1. Avocado Toast with a Twist
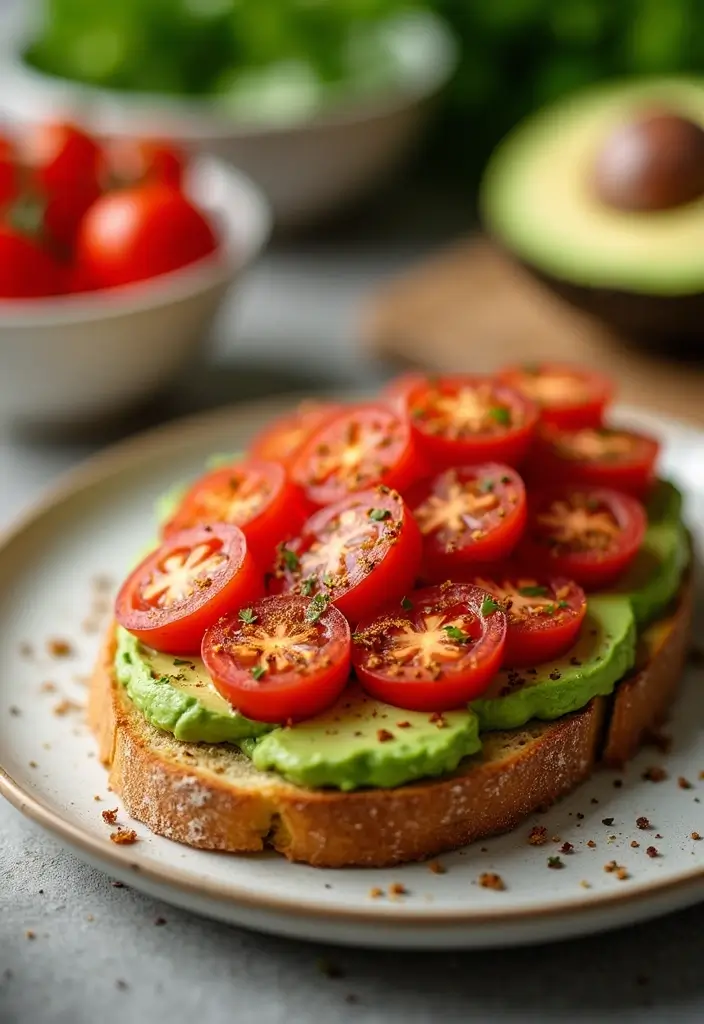
Elevate your snacking game with a delightful twist on the classic avocado toast! This version packs a punch of flavor with zesty lemon juice, juicy cherry tomatoes, and a hint of chili flakes. It’s not just creamy; it’s a vibrant treat that hits the spot any time of day. Perfect for breakfast or a midday snack, this recipe is easy to whip up and sure to impress.
Recipe Overview
– Servings: 2
– Prep Time: 5 minutes
– Cook Time: 0 minutes
– Total Time: 5 minutes
– Calories: Approximately 220 per serving
Nutrition Information:
– Protein: 3g
– Fat: 18g
– Carbs: 12g
– Fiber: 7g
Ingredients:
– 1 ripe avocado
– 2 slices of whole grain bread
– 1 teaspoon lemon juice
– ½ cup cherry tomatoes, halved
– Chili flakes, to taste
– Salt and pepper, to taste
Instructions:
1. Toast the whole grain bread until golden brown.
2. In a bowl, mash the ripe avocado with lemon juice, salt, and pepper until creamy.
3. Spread the avocado mixture generously over the warm toast.
4. Top with halved cherry tomatoes and a sprinkle of chili flakes for that extra kick.
5. Serve immediately for a refreshing and satisfying snack!
Using ripe avocados ensures a smooth and flavorful spread. If you like a little heat, don’t skip the chili flakes!
Frequently Asked Questions:
– Can I use gluten-free bread? Absolutely! Feel free to swap in your favorite gluten-free option.
This avocado toast with a twist is not only delicious but also a healthy choice. Enjoy it as a quick bite or a light meal—it’s sure to brighten your day!
Avocado Toast with a Twist
Editor’s Choice


Dave’s Killer Bread 21 Whole Grains & Seeds Thin-Sliced, Whole Grain Org…
 AmazonCheck Price
52USA Premium Sichuan Chili Flakes(8 OZ), Ground Sichuan Red Chili Pepper
 AmazonCheck Price
2. Energy Balls: The Power Snack
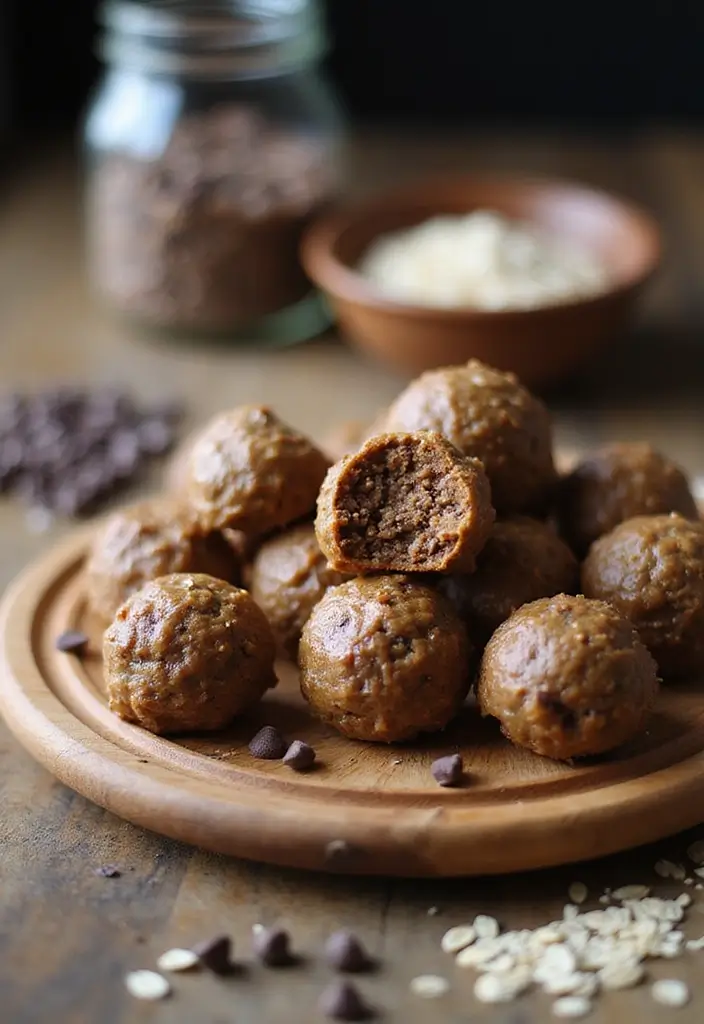
Energy balls are your new go-to for a quick, healthy snack! These tasty little bites are packed with nutritious ingredients like oats and nut butter. They provide a boost of energy without the sugar crash that comes from many snacks. Plus, you can easily customize them with your favorite add-ins, like dried fruit or seeds.
Let’s break down a simple recipe that you can whip up in just 10 minutes. Perfect for busy days or post-workout refueling, these energy balls are as delicious as they are nutritious.
Recipe Overview
– Servings: 10
– Prep Time: 10 minutes
– Cook Time: 0 minutes
– Total Time: 10 minutes
– Calories: About 100 per ball
Nutrition Information
– Protein: 4g
– Fat: 6g
– Carbs: 10g
– Fiber: 2g
Ingredients
– 1 cup rolled oats
– 1/2 cup nut butter (peanut or almond)
– 1/4 cup honey or maple syrup
– 1/4 cup dark chocolate chips (optional)
– 2 tablespoons chia seeds (optional)
– 1/2 teaspoon vanilla extract
Instructions
1. In a large bowl, mix together the oats, nut butter, honey, and vanilla extract.
2. If you want, stir in the chocolate chips and chia seeds for an extra crunch.
3. Roll the mixture into balls about 1 inch in diameter.
4. Place them on a plate lined with parchment paper and refrigerate for at least 30 minutes.
5. Store your energy balls in an airtight container in the fridge for up to a week.
You can switch up the nut butter or sprinkle in spices like cinnamon to keep things interesting.
Frequently Asked Questions
– Can I freeze them? Yes, they freeze nicely for up to three months!
These energy balls are not just easy to make, they also taste great and give you the energy needed for your day. Enjoy them as a snack before a workout or as a quick pick-me-up during your busy afternoon. With endless combinations, you’ll never get bored!
Energy Balls: The Power Snack
Editor’s Choice

Quaker Old Fashioned Rolled Oats, Non GMO Project Verified, Two 64oz Bag…
 Amazon$7.03
Amazon Grocery, Crunchy Peanut Butter, 40 Oz, Pack of 2 (Previously Amaz…
 AmazonCheck Price
BetterBody Foods Organic Chia Seeds 2 lbs, 32 Oz, with Omega-3, Non-GMO,…
 Amazon$11.97
3. Nutty Banana Bites
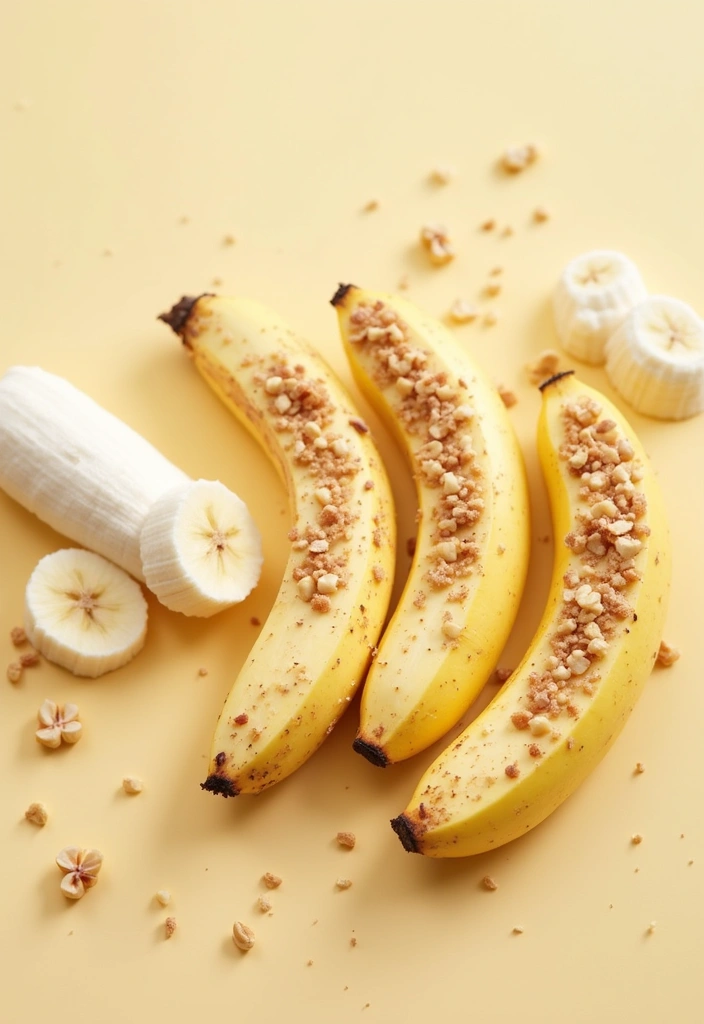
Indulge your sweet tooth without guilt with these delightful Nutty Banana Bites! They are not only easy to whip up but also packed with flavor and nutrition. Just two main ingredients—ripe bananas and almond butter—come together to create a treat everyone can enjoy. Whether you’re a busy parent seeking a quick snack for your kids or an adult craving something sweet, these bites will hit the spot!
In just five minutes, you can prepare a healthy snack that’s as satisfying as it is simple. Start by slicing a ripe banana and spreading a layer of creamy almond butter on half of the slices. Top them with your choice of chopped nuts for that extra crunch, and then sandwich them with the remaining banana slices. If you want to elevate the flavor, sprinkle a touch of cinnamon on top. Store them in the fridge for an easy grab-and-go snack later!
Recipe Overview
– Servings: 2
– Prep Time: 5 minutes
– Cook Time: 0 minutes
– Total Time: 5 minutes
– Calories: About 150 per serving
Nutrition Information:
– Protein: 3g
– Fat: 8g
– Carbs: 20g
– Fiber: 3g
Ingredients:
– 1 ripe banana
– 2 tablespoons almond butter
– 1 tablespoon chopped nuts (walnuts or almonds)
Instructions:
1. Slice the banana into rounds.
2. Spread almond butter on half of the banana slices.
3. Top with chopped nuts and cover with the remaining banana slices.
4. Enjoy immediately or refrigerate for later.
You might wonder if you can swap almond butter for something else. The answer is yes! You can easily use peanut butter or any nut butter you prefer. Enjoy these bites as a quick snack, dessert, or a post-workout treat. They’re versatile, nutritious, and downright delicious!
Nutty Banana Bites
Editor’s Choice

365 by Whole Foods Market, Organic Creamy Almond Butter, 16 Ounce
 Amazon$13.99

True Organic Pure Ceylon Cinnamon Powder, 1 lb, Premium Grade, Gluten Fr…
 Amazon$14.95
4. Sweet Potato Chips
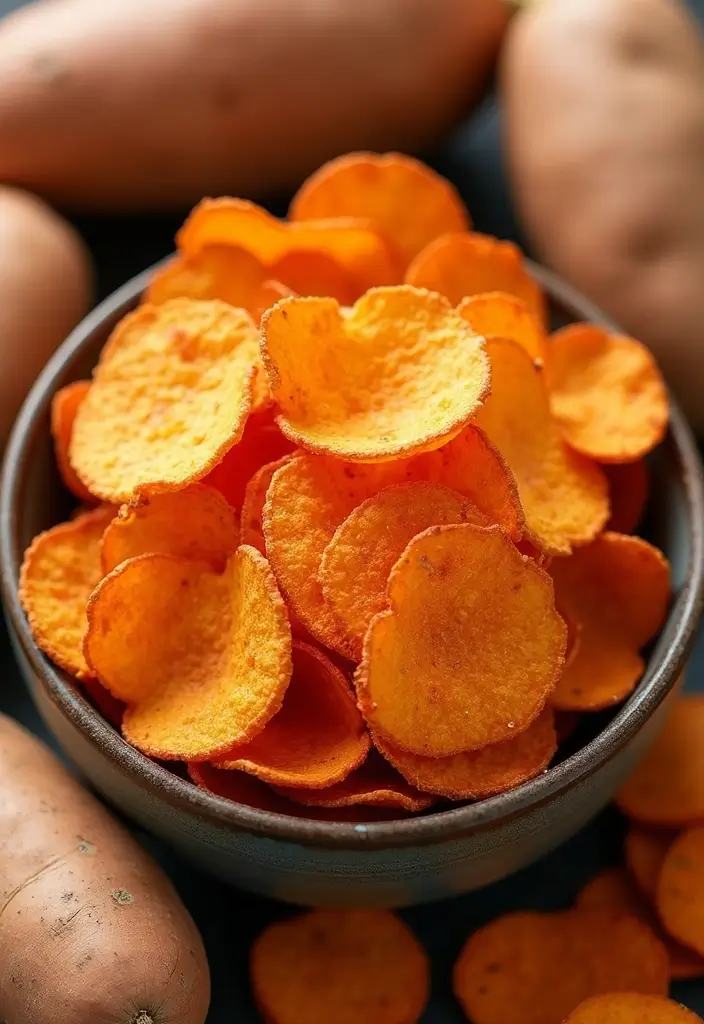
Sweet potato chips are a delightful snack that hits the spot without the guilt. Imagine crispy, golden slices that are both crunchy and nutritious. These homemade treats are easy to whip up and can be seasoned just the way you like. Once you try these flavorful chips, you may never reach for store-bought again!
Here’s a quick glance at the recipe:
– Servings: 4
– Prep Time: 10 minutes
– Cook Time: 20 minutes
– Total Time: 30 minutes
– Calories: About 150 per serving
Nutrition Breakdown:
– Protein: 2g
– Fat: 7g
– Carbohydrates: 22g
– Fiber: 3g
Ingredients:
– 2 large sweet potatoes
– 1 tablespoon olive oil
– Salt, to taste
– 1 teaspoon paprika (optional)
Instructions:
1. Preheat your oven to 400°F (200°C).
2. Slice the sweet potatoes thinly. A mandoline works best for even slices.
3. In a bowl, toss the slices with olive oil, salt, and paprika until well coated.
4. Lay the slices in a single layer on a baking sheet.
5. Bake for 20 minutes, flipping halfway through, until they are crispy.
Be sure to watch them closely; they can burn quickly!
Tips and Tricks:
– Experiment with seasonings: Use garlic powder or chili powder for a kick.
– Customize your crunch: Try adding a sprinkle of parmesan cheese before baking for a cheesy flavor.
– Store leftovers: If you have any, keep them in an airtight container to maintain their crunch.
These sweet potato chips are perfect for movie nights or as a quick afternoon snack. Enjoy the satisfying crunch while knowing you are making a healthier choice!
Sweet Potato Chips
Editor’s Choice

OXO Good Grips Handheld Mandoline Slicer for Kitchen, Adjustable Vegetab…
 Amazon$18.50
GoodCook Everyday Nonstick Carbon Steel Baking Sheet Set, 3 Pack – Small…
 Amazon$17.99
Rubbermaid Brilliance 16-Cup Airtight Food Storage Container with Lid Cl…
 Amazon$13.29
5. Vegan Hummus with Veggie Sticks
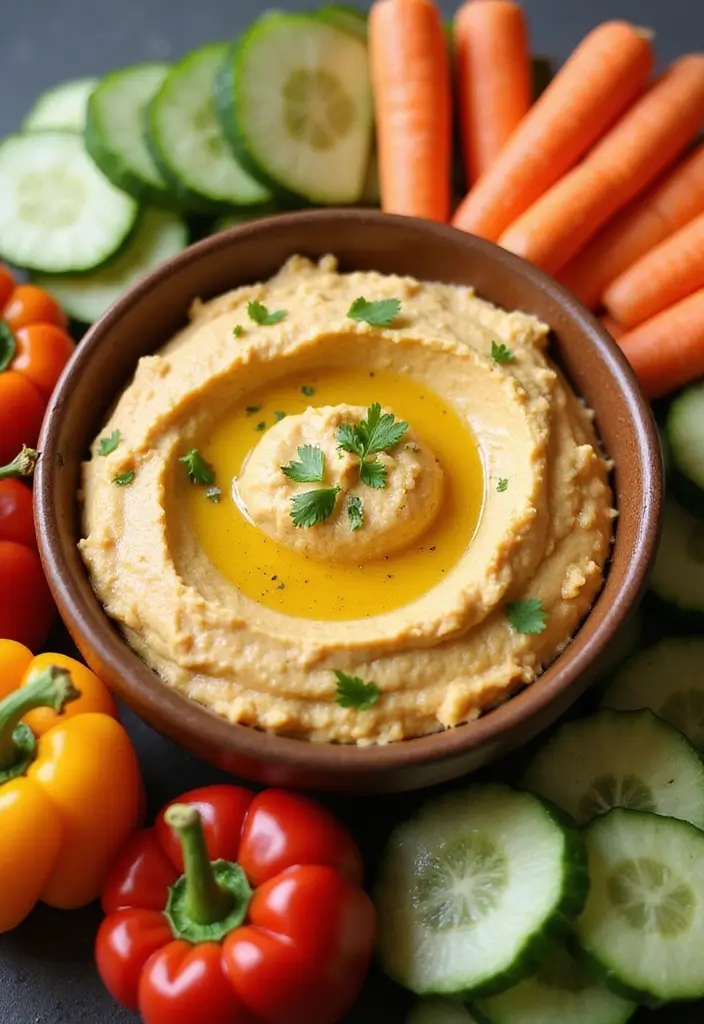
Are you looking for a tasty snack that’s both healthy and easy to make? Look no further than this Vegan Hummus with Veggie Sticks. This creamy dip brings flavor and nutrition in every bite. Packed with protein and fiber, it keeps you full and satisfied. The best part? You can customize it with your favorite spices or add-ins for a unique twist.
Here’s a quick overview of this simple recipe:
– Servings: 4
– Prep Time: 10 minutes
– Cook Time: 0 minutes
– Total Time: 10 minutes
– Calories: About 90 per serving
Nutrition Information:
– Protein: 4g
– Fat: 5g
– Carbs: 10g
– Fiber: 3g
Ingredients:
– 1 can (15 oz) chickpeas, drained and rinsed
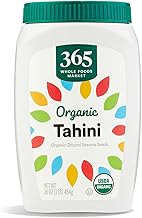
– 2 tablespoons tahini
– 1 tablespoon olive oil
– 1 garlic clove, minced
– Juice of 1 lemon
– Salt, to taste
– Assorted veggie sticks (carrots, cucumbers, bell peppers) for dipping
Instructions:
1. Place the chickpeas, tahini, olive oil, garlic, lemon juice, and a pinch of salt in a food processor.
2. Blend everything until it’s smooth. If it’s too thick, add a little water until you reach your desired consistency.
3. Serve with fresh vegetable sticks for a crunchy, healthy dip.
Want to spice it up? Try adding roasted red peppers or a sprinkle of cumin for extra flavor.
Frequently Asked Questions:
– How long can I store it? Hummus stays fresh in the fridge for up to a week, making it a great make-ahead snack.
Now, grab your ingredients and enjoy a healthy snack that’s perfect for any time of day!
Vegan Hummus with Veggie Sticks
Editor’s Choice

Hamilton Beach Food Processor & Vegetable Chopper for Slicing, Shredding…
 Amazon$46.98
Bentgo Prep – 2-Compartment Snack Containers with Lids – Reusable, Micro…
 Amazon$12.99
6. Chocolate-Dipped Fruit

Craving something sweet but want to keep it healthy? Chocolate-dipped fruit is your answer! This delightful treat is a fantastic way to satisfy your sweet tooth while enjoying fresh flavors. You can use juicy strawberries, ripe bananas, or any fruit you love. The best part? It’s simple to make and perfect as a snack or dessert for any occasion.
Recipe Overview
– Servings: 4
– Prep Time: 15 minutes
– Cook Time: 5 minutes
– Total Time: 20 minutes
– Calories: Approximately 180 per serving
Nutrition Information:
– Protein: 2g
– Fat: 10g
– Carbs: 22g
– Fiber: 2g
Ingredients:
– 1 cup dark chocolate chips
– 1 cup strawberries or banana slices
– Optional toppings: crushed nuts, coconut flakes
Instructions:
1. Begin by melting the dark chocolate. You can do this in a microwave-safe bowl or over a double boiler. Stir until it’s smooth and creamy.
2. Take each piece of fruit and dip it into the melted chocolate. Make sure to let the excess chocolate drip back into the bowl.
3. Place the chocolate-dipped fruit on parchment paper. If you want, sprinkle on some toppings like crushed nuts or coconut flakes for an extra crunch.
4. Pop the tray in the fridge and let the chocolate set for about 10 minutes.
Tip: Choose high-quality dark chocolate for a richer flavor that pairs beautifully with the freshness of the fruit.
Frequently Asked Questions:
– Can I use white chocolate? Absolutely! Feel free to experiment with different types of chocolate for varied flavors.
– What fruits work best? Besides strawberries and bananas, try apples, oranges, or even pineapple for a tropical twist!
Enjoy this guilt-free treat any time you need a little sweetness in your life! It’s an easy way to indulge without compromising on nutrition.
Chocolate-Dipped Fruit
Editor’s Choice

Enjoy Life Baking Dark Chocolate Morsels, Dairy Free, Soy Free, Nut Free…
 AmazonCheck Price
Reynolds Kitchens Unbleached Parchment Paper Roll, Non Stick Parchment P…
 Amazon$3.39
Umite Chef Mixing Bowls with Airtight Lids Set, 8PCS Stainless Steel Kha…
 Amazon$29.99
7. Quinoa Salad Jars
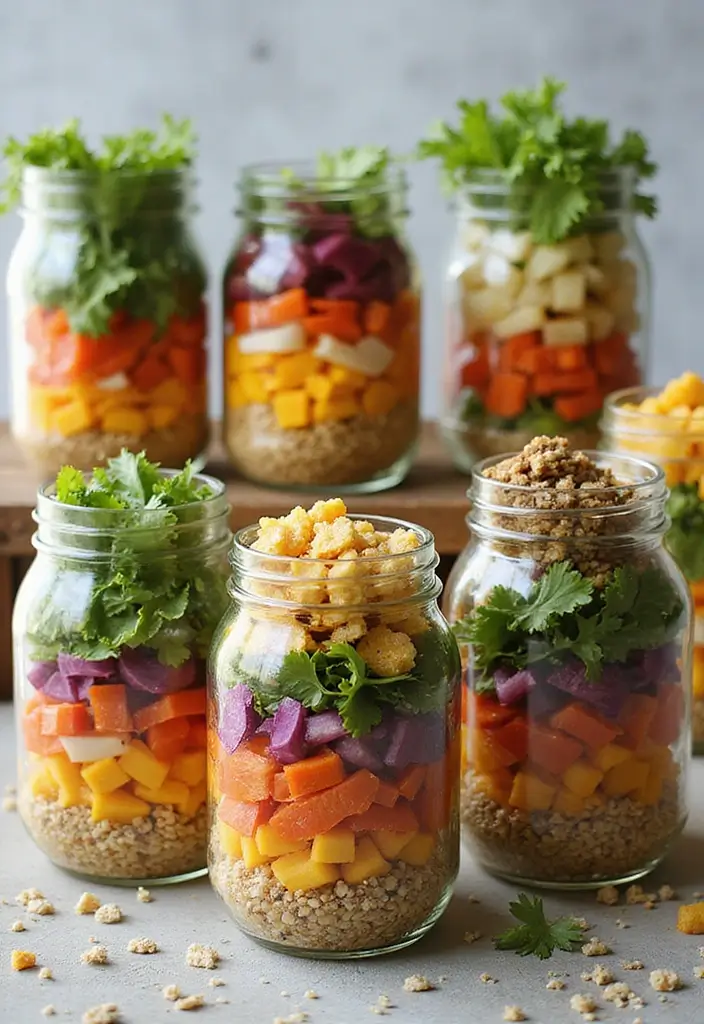
Quinoa salad jars are your new best friend for quick, healthy snacks. They’re colorful, tasty, and perfect for meal prep. Just layer your favorite ingredients in a jar, and you’ve got a grab-and-go option that’s as nutritious as it is delicious. Plus, these jars look fantastic, making your meals feel special every time you open the fridge!
Imagine this: you’re busy and need something healthy. With quinoa salad jars, you can whip up a meal in just 30 minutes. They keep well in the fridge, and you can customize them to match your mood or what you have on hand. Whether you’re craving something light or hearty, these jars have you covered.
Ready to make your own? Here’s how:
Recipe Overview
– Servings: 2
– Prep Time: 15 minutes
– Cook Time: 15 minutes
– Total Time: 30 minutes
– Calories: About 250 per jar
Nutrition Information
– Protein: 8g
– Fat: 7g
– Carbs: 40g
– Fiber: 6g
Ingredients:
– 1 cup cooked quinoa
– 1/2 cup cherry tomatoes, halved
– 1/2 cucumber, diced
– 1/4 cup red onion, chopped
– 1/4 cup chickpeas
– Dressing of your choice (balsamic vinaigrette works great!)
Instructions:
1. Start by adding your dressing to the bottom of a clean mason jar.
2. Layer in the cooked quinoa next.
3. Add your veggies, stacking them by color and texture.
4. Seal the jar tightly and refrigerate until you’re ready to enjoy. Remember to give it a good shake before eating!
Tips for Customization:
Feel free to add grilled chicken, nuts, or seeds for extra protein and crunch. You can mix up the veggies based on what’s in season or what you love.
Frequently Asked Questions:
– How long do these jars last? They’re good in the fridge for up to 5 days, making them perfect for meal prepping!
With quinoa salad jars, you’ll have a beautiful, healthy snack ready whenever you need it. Enjoy the flavors and benefits of this vibrant dish!
Quinoa Salad Jars
Editor’s Choice
![25 Healthy Snack Recipes Easy and Delicious 42 Wide Mouth Mason Jars 16 oz with Lids [6 Pack], Canning Jars with Metal ...](https://m.media-amazon.com/images/I/815tipUxlyL._AC_UL320_.jpg)
Wide Mouth Mason Jars 16 oz with Lids [6 Pack], Canning Jars with Metal …
 AmazonGBP 15.74
BetterBody Foods Organic Quinoa, Vegan, Gluten Free, Low Glycemic Rice R…
 Amazon$11.49
8. Spicy Roasted Chickpeas
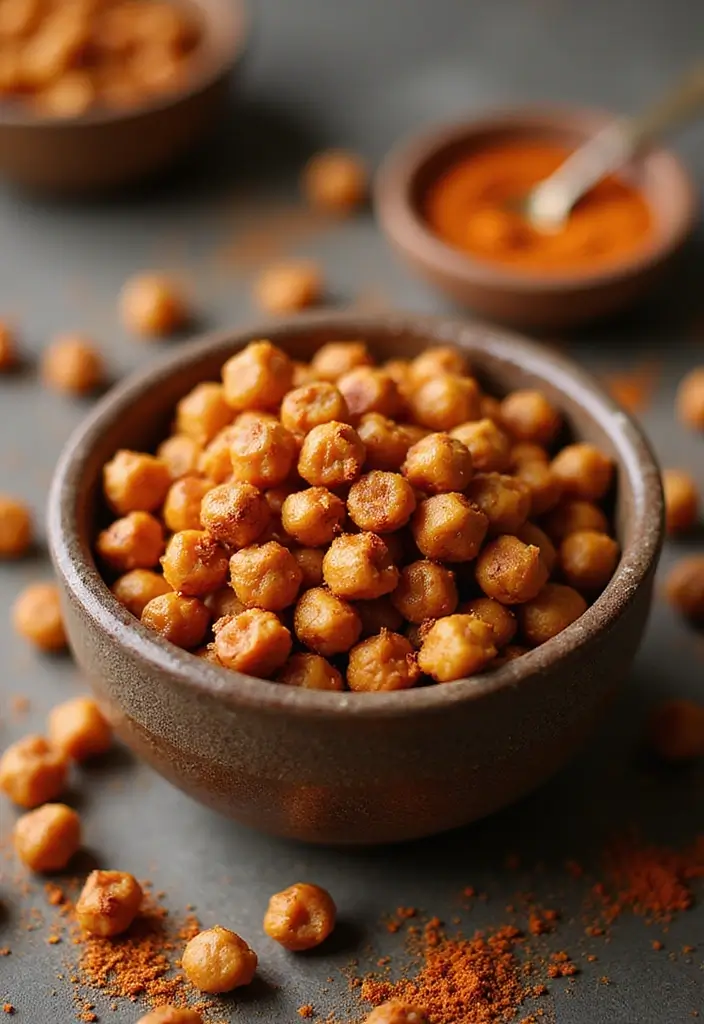
Craving a snack that’s both crunchy and packed with flavor? Look no further than spicy roasted chickpeas! These little powerhouses are not only delicious, but they also offer a great source of protein and fiber. Whether you need a quick midday boost or something to munch on during movie night, these roasted chickpeas will satisfy your cravings without the guilt.
Let’s dive into how to make this easy snack!
Recipe Overview
– Servings: 4
– Prep Time: 10 minutes
– Cook Time: 30 minutes
– Total Time: 40 minutes
– Calories: Approximately 120 per serving
Nutrition Information:
– Protein: 6g
– Fat: 2g
– Carbs: 20g
– Fiber: 5g
Ingredients:
– 1 can (15 oz) chickpeas, drained and rinsed
– 1 tablespoon olive oil
– 1 teaspoon cumin
– 1 teaspoon paprika
– Salt and pepper, to taste
Instructions:
1. Preheat your oven to 400°F (200°C).
2. Pat the chickpeas dry using a paper towel. This step is key for that crunchy texture!
3. In a bowl, toss the chickpeas with olive oil, cumin, paprika, salt, and pepper until well-coated.
4. Spread them out on a baking sheet in a single layer. Roast for 30 minutes, shaking the pan halfway through to ensure even cooking.
Feel free to tweak the spices according to your taste. If you love heat, add a pinch of cayenne pepper for a spicy kick!
Frequently Asked Questions:
– Can I use dried chickpeas? Yes, but make sure to cook them first!
In just a few simple steps, you can whip up a snack that’s not only healthy but also bursting with flavor. Enjoy these crispy chickpeas alone or toss them on a salad for a crunchy twist!
Fun fact: just a 1/4 cup of spicy roasted chickpeas packs about 5 g protein and 3 g fiber—proof that healthy snack recipes easy can power your day. Crunchy, flavorful bites turn guilt-free snacking into a daily habit, even during movie nights.
Spicy Roasted Chickpeas
Editor’s Choice

Amazon Grocery, Canned Garbanzo Beans, 15.5 Oz (Previously Amazon Fresh,…
 Amazon$0.79
Organic Extra Virgin Olive Oil – Premium Single-Source Greek EVOO with C…
 AmazonCheck Price
9. Coconut Chia Pudding
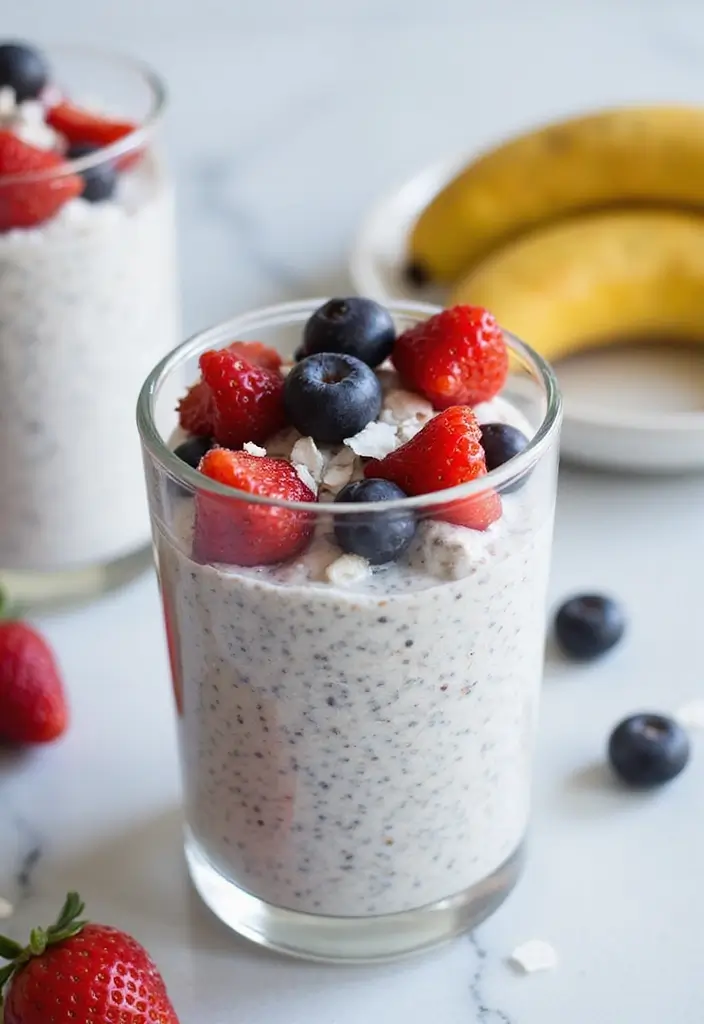
Coconut chia pudding is a delightful treat that brings together health and flavor. With its creamy texture and subtle sweetness, it satisfies your cravings without the guilt. Plus, it’s packed with omega-3 fatty acids and fiber, making it a smart choice for a healthy snack. You can prep it in just five minutes and let it chill while you go about your day, perfect for those late-night munchies!
Let’s dive into how to make this delicious pudding. It’s simple, and you can customize it to your taste. Here’s what you’ll need:
Ingredients:
– 1/4 cup chia seeds
– 1 cup coconut milk
– 1 tablespoon maple syrup (optional)
– Fresh fruit for topping (like mango, berries, or banana)
Instructions:
1. In a mixing bowl, combine the chia seeds and coconut milk. If you like it sweeter, add the maple syrup.
2. Stir the mixture well, then let it sit for about 5 minutes. Stir again to break up clumps.
3. Cover the bowl and refrigerate for at least 2 hours, or better yet, overnight.
4. When you’re ready to enjoy, scoop out the pudding into bowls and top with your favorite fresh fruits.
If you want a creamier texture, blend the mixture before chilling. This pudding is not only easy to make but also versatile. You can swap coconut milk for almond milk or add a sprinkle of cinnamon for extra flavor.
Frequently Asked Questions:
– Can I use almond milk instead? Yes, any milk alternative works well.
– How long can I store it? This pudding keeps well in the fridge for up to 5 days.
Enjoy this nutritious snack anytime! It’s the perfect blend of health and indulgence, making it a favorite for both your taste buds and your body.
Coconut Chia Pudding
Editor’s Choice

Garden of Life Chia Seeds 100% Organic for Smoothies, Pudding – Raw Orga…
 AmazonCheck Price
Simply Asia Unsweetened Coconut Milk, 13.66 fl oz – One 13.66 Ounce Can …
 AmazonCheck Price
Butternut Mountain Farm Pure Vermont Maple Syrup, Grade A, Dark Color, R…
 Amazon$17.97
10. Peanut Butter Oatmeal Bars
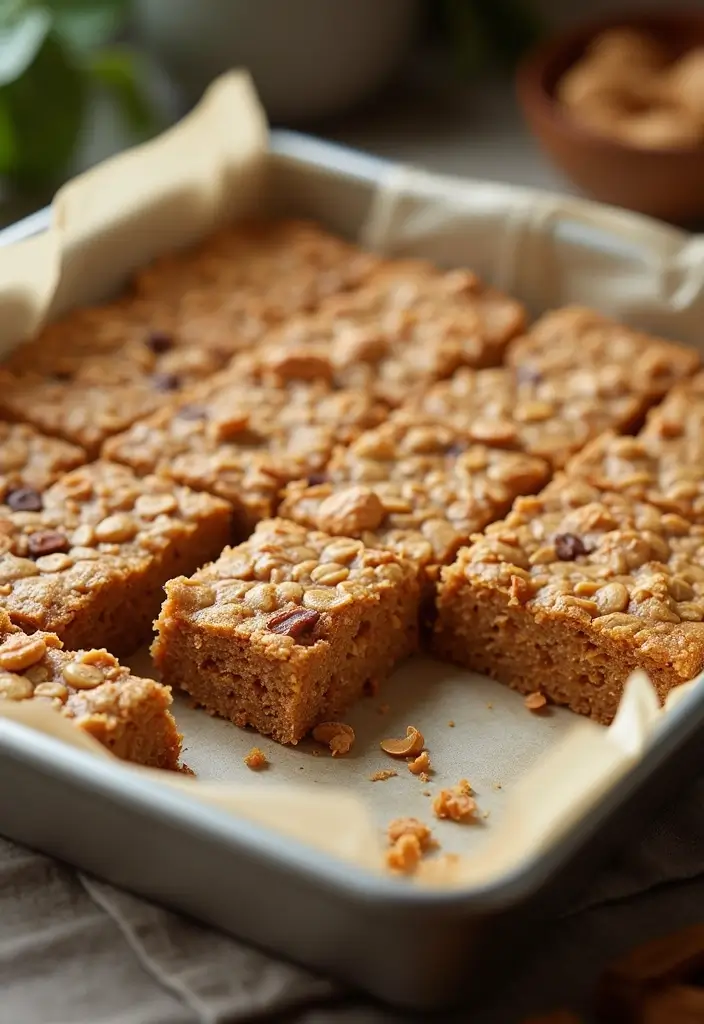
If you’re looking for a quick, nutritious snack, these peanut butter oatmeal bars are just what you need! Perfect for busy days, they offer a delicious mix of flavors and textures. You can easily customize them by adding your favorite nuts or dried fruits. Plus, they fit perfectly in lunch boxes, making them a convenient treat wherever you go.
Here’s how to whip up these tasty bars:
Recipe Overview
– Servings: 12
– Prep Time: 10 minutes
– Cook Time: 20 minutes
– Total Time: 30 minutes
– Calories: About 200 per bar
Nutritional Information:
– Protein: 5g
– Fat: 9g
– Carbs: 28g
– Fiber: 4g
Ingredients:
– 2 cups rolled oats
– 1 cup peanut butter
– 1/2 cup honey or maple syrup
– 1/2 cup chopped nuts (optional)
– 1/2 cup dried fruit (optional)
Instructions:
1. Preheat your oven to 350°F (175°C).
2. In a large bowl, combine the rolled oats, peanut butter, and honey until everything is mixed well.
3. If you like, fold in the chopped nuts and dried fruit for extra flavor.
4. Press the mixture firmly into a greased baking dish.
5. Bake for 20 minutes. Once done, let it cool before cutting into bars.
Store your bars in an airtight container to keep them fresh and delicious.
FAQs:
– Can I substitute almond butter? Yes, almond butter works great too!
– How long do these bars last? They can stay fresh for about a week.
Enjoy these wholesome snacks anytime you need a boost!
Peanut Butter Oatmeal Bars
Editor’s Choice

Quaker Old Fashioned Rolled Oats, Non GMO Project Verified, Two 64oz Bag…
 Amazon$7.03
SKIPPY Natural Creamy Peanut Butter Spread Twin Pack 2-Pack, 5 LB
 Amazon$9.42
Rubbermaid Brilliance 16-Cup Airtight Food Storage Container with Lid Cl…
 Amazon$13.29
11. Zucchini Chips
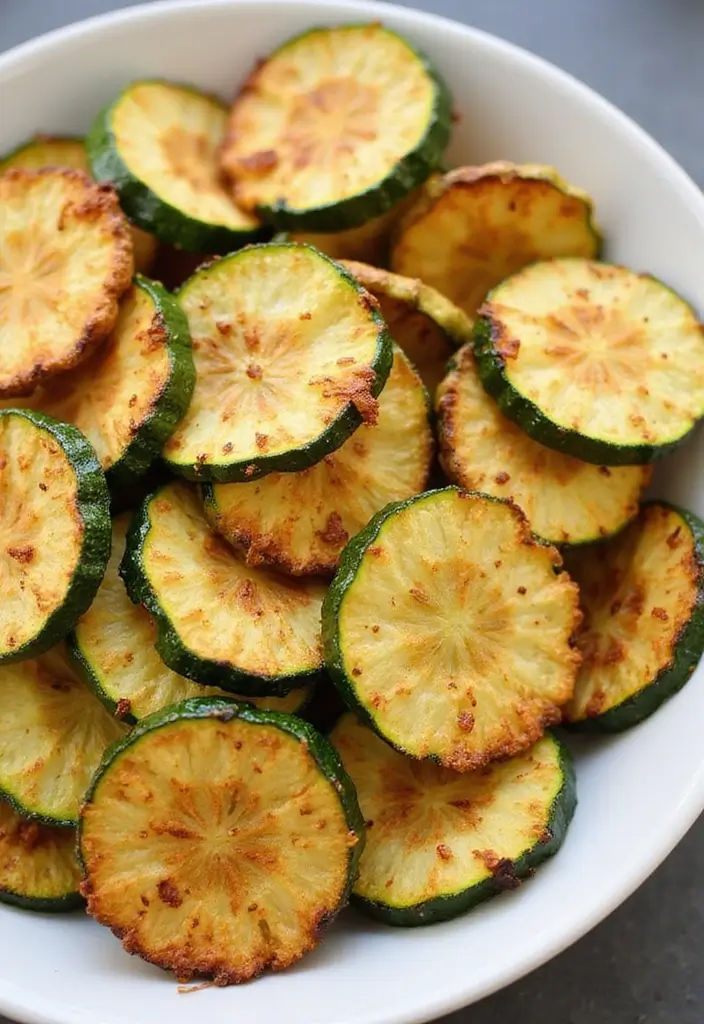
Craving something crunchy and guilt-free? Try zucchini chips! These tasty treats pack a satisfying crunch while being light and healthy. You can easily customize them with different seasonings, making them a fun snack for everyone. Plus, they’re a great way to enjoy vegetables in a new way!
Here’s what you need to know to whip up a batch of zucchini chips in no time.
Recipe Overview
– Servings: 4
– Prep Time: 10 minutes
– Cook Time: 30 minutes
– Total Time: 40 minutes
– Calories: About 90 per serving
Nutritional Information:
– Protein: 3g
– Fat: 4g
– Carbs: 10g
– Fiber: 3g
Ingredients:
– 2 medium zucchinis
– 1 tablespoon olive oil
– Salt and pepper, to taste
– Garlic powder (optional)
Instructions:
1. Preheat your oven to 425°F (220°C).
2. Slice the zucchinis thinly using a mandoline or a knife. Aim for even slices for the best crunch.
3. Toss the slices in a bowl with olive oil, salt, and, if you like, a sprinkle of garlic powder for extra flavor.
4. Spread the slices out on a baking sheet in a single layer. This helps them cook evenly.
5. Bake for about 30 minutes, flipping them halfway through. Keep an eye on them towards the end to avoid burning. You want them crispy, not charred!
Want a less oily option? You can use a dehydrator instead! This method gives you super crunchy chips without adding extra fat.
Now you have a delicious and healthy snack ready to enjoy. Whether you’re watching a movie or need a midday pick-me-up, these zucchini chips are perfect. Enjoy guilt-free snacking!
Quick Tips:
– Use a mandoline for even slicing.
– Choose fresh, firm zucchinis for the best texture.
– Experiment with seasonings like paprika or parmesan cheese.
– Store leftovers in an airtight container for a few days.
Zucchini Chips
Editor’s Choice

Gramercy Adjustable Mandoline Food Slicer, Mandoline Slicer for Kitchen,…
 Amazon$42.95
COSORI Food Dehydrator, Bigger Than 7 Trays With Large 6.5″ Drying Space…
 Amazon$149.99
YARRAMATE 16oz/470ml Glass Olive Oil Sprayer for Cooking with Stickers, …
 Amazon$8.99
12. Almond Joy Energy Balls
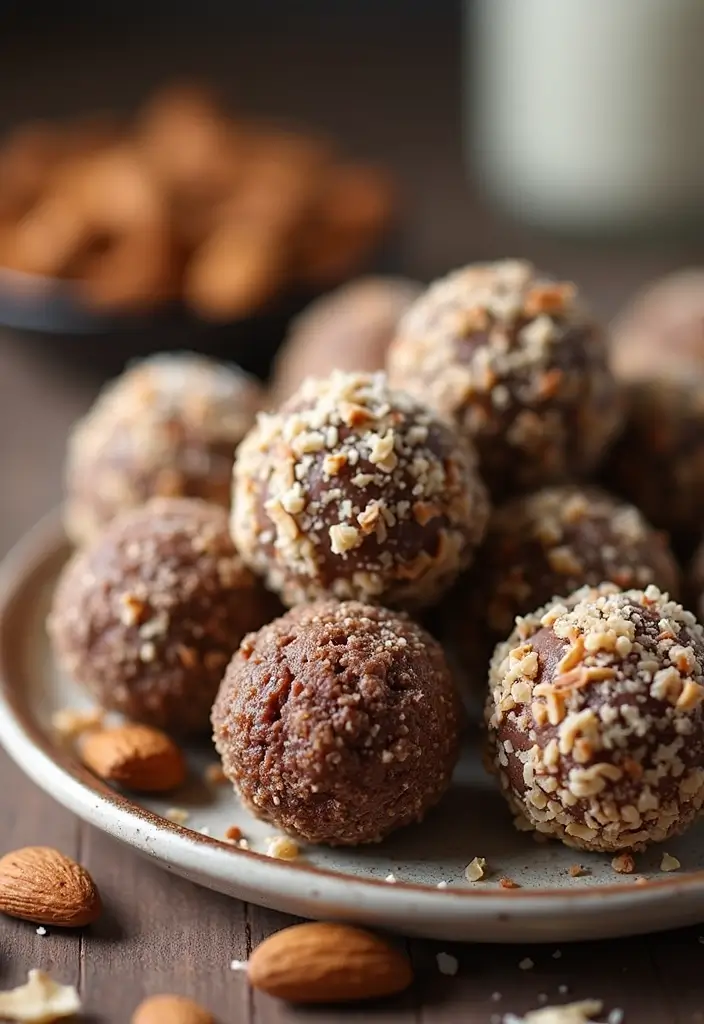
Craving a snack that satisfies your sweet tooth without the guilt? Try these Almond Joy Energy Balls! They capture the deliciousness of Almond Joy candy bars but pack a nutritious punch. With a blend of almonds, coconut, and dates, these energy bites offer a quick pick-me-up anytime you need it. Plus, they’re super easy to make!
Recipe Overview
– Servings: 12
– Prep Time: 15 minutes
– Cook Time: 0 minutes
– Total Time: 15 minutes
– Calories: Approximately 90 per ball
Nutrition Information:
– Protein: 3g
– Fat: 5g
– Carbs: 10g
– Fiber: 2g
Ingredients:
– 1 cup almonds
– 1 cup pitted dates
– 1/2 cup unsweetened shredded coconut
– 1 tablespoon cocoa powder
– 1/4 teaspoon sea salt
Instructions:
1. Place the almonds, dates, shredded coconut, cocoa powder, and sea salt in a food processor.
2. Pulse until the mixture forms a sticky dough. You might need to scrape down the sides once or twice.
3. Roll the dough into small balls, about the size of a tablespoon, and set them on a tray.
4. Refrigerate for at least 30 minutes to let them firm up.
Want to switch things up? Add a drop of almond extract for extra flavor. These energy balls are perfect for a quick snack or even a post-workout treat. Plus, they’re easy to customize with your favorite nuts or dried fruits!
Frequently Asked Questions:
– Can I use other nuts? Yes! Feel free to swap in your favorite nuts for a different flavor.
With these Almond Joy Energy Balls, you can enjoy a tasty treat that fuels your day without all the sugar. They’re the perfect blend of taste and nutrition, making them a go-to snack in your healthy repertoire!
Almond Joy Energy Balls
Editor’s Choice

Hamilton Beach Food Processor & Vegetable Chopper for Slicing, Shredding…
 Amazon$46.98
Blue Diamond Almonds Whole Natural Raw Snack Nuts, 100 Calorie Travel Ba…
 AmazonCheck Price
13. Cauliflower Popcorn

Cauliflower popcorn is a delightful twist on your traditional snack! These crispy florets are roasted to perfection, making them a fantastic low-carb alternative to regular popcorn. Whether you’re hosting a movie night or just craving something light and crunchy, this snack is sure to please.
Let’s get you started with a quick overview of the recipe:
– Servings: 4
– Prep Time: 10 minutes
– Cook Time: 25 minutes
– Total Time: 35 minutes
– Calories: Approximately 50 per serving
Nutritional Information:
– Protein: 2g
– Fat: 3g
– Carbs: 5g
– Fiber: 2g
Ingredients:
– 1 large cauliflower head
– 2 tablespoons olive oil
– Salt and pepper, to taste
– Nutritional yeast (optional, for a cheesy flavor)
Instructions:
1. Preheat your oven to 400°F (200°C).
2. Cut the cauliflower into bite-sized florets. This will help them roast evenly.
3. In a bowl, toss the florets with olive oil, salt, pepper, and nutritional yeast if you want that cheesy taste.
4. Spread the florets on a baking sheet in a single layer.
5. Roast for about 25 minutes, or until they turn golden and crispy.
Feel free to experiment with different spices! Try adding paprika for a smoky flavor or cayenne for a spicy kick.
Frequently Asked Questions:
– Can I use frozen cauliflower? Fresh cauliflower gives the best texture, but if you use frozen, make sure to thaw and pat it dry first.
Enjoy your tasty, healthy snack! It’s perfect for munching while binge-watching your favorite show or as a light afternoon pick-me-up. You’ll love how easy it is to make and how satisfying it feels to snack healthy!
Cauliflower Popcorn
Editor’s Choice

Cosori 9-in-1 TurboBlaze Air Fryer 6 Qt, Premium Ceramic Coating, 90°–45…
 Amazon$89.93
Bragg Premium Nutritional Yeast Seasoning – Vegan, Gluten Free – Good So…
 Amazon$14.99
Amazon Basics Silicone Rectangular Baking Mat, Non-Stick Reusable Oven B…
 Amazon$16.79
14. Fruit and Nut Trail Mix
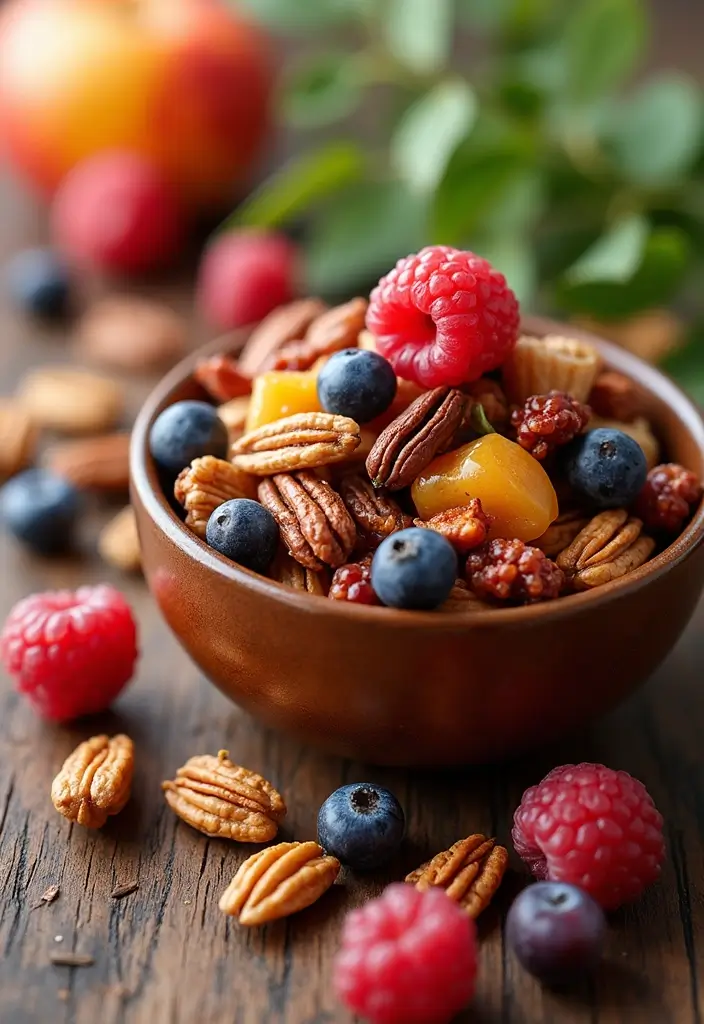
Are you searching for a quick and tasty snack that keeps your energy up? Look no further than a homemade fruit and nut trail mix! This delightful blend is not only easy to prepare but also offers the perfect balance of sweet and savory flavors. Plus, you can customize it with your favorite ingredients. Imagine munching on crunchy nuts, chewy dried fruits, and maybe even a hint of chocolate. It’s a snack that’s as satisfying as it is nutritious!
Recipe Overview
– Servings: 4
– Prep Time: 5 minutes
– Cook Time: 0 minutes
– Total Time: 5 minutes
– Calories: About 200 per serving
Nutrition Information:
– Protein: 5g
– Fat: 12g
– Carbs: 25g
– Fiber: 3g
Ingredients:
– 1 cup mixed nuts (like almonds, walnuts, and cashews)
– 1/2 cup dried fruit (try raisins, cranberries, or apricots)
– 1/4 cup dark chocolate chips (optional for a sweet twist)
Instructions:
1. Grab a medium bowl and combine the mixed nuts and dried fruit.
2. If you want a sweet touch, add in the chocolate chips.
3. Store your trail mix in an airtight container. This keeps it fresh and ready for snacking!
You can get creative with your trail mix! Swap out nuts or fruits based on your taste. Want a crunch? Toss in some seeds or even popcorn.
Frequently Asked Questions:
– Can I make it savory? Absolutely! Just omit the chocolate and add in seeds or popcorn for a savory crunch.
With this trail mix, you’ll have a healthy snack that’s perfect for on-the-go days or cozy movie nights. Enjoy the flavors, and feel good about what you’re eating!
Fruit and Nut Trail Mix
Editor’s Choice

Airtight Food Storage Containers with Lids, Vtopmart 24 pcs Plastic Kitc…
 Amazon$35.99
Emerald Nuts Mixed Nuts Variety Pack 18ct (1-Pack) , 100-Calorie Individ…
 Amazon$10.00
Mariani Mixed Fruit – 30oz Bulk Bag, Dried Fruit Mix No Sugar Added – Pe…
 Amazon$20.45
15. Veggie Sushi Rolls
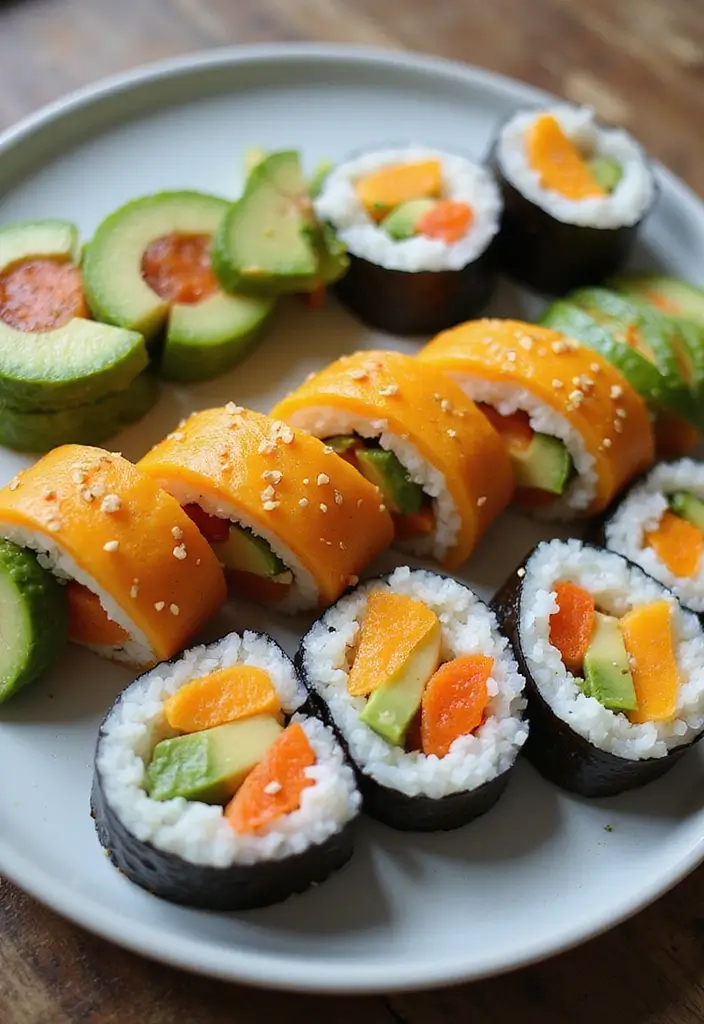
Get ready to roll with these colorful Veggie Sushi Rolls! They’re not just a snack; they’re a delicious way to sneak in fresh veggies while satisfying your sushi cravings. You can fill them with your favorite ingredients, making them a fun and customizable treat. Whether you’re a sushi novice or a pro, these rolls are easy to make and sure to impress.
Recipe Overview
– Servings: 2
– Prep Time: 15 minutes
– Cook Time: 0 minutes
– Total Time: 15 minutes
– Calories: About 150 per roll
Nutrition Information
– Protein: 4g
– Fat: 1g
– Carbs: 30g
– Fiber: 4g
Ingredients:
– 1 cup cooked sushi rice
– 4 sheets nori (seaweed)
– 1/2 cucumber, cut into thin strips
– 1/2 avocado, sliced
– 1/4 bell pepper, sliced
– Soy sauce for dipping (optional)
Instructions:
1. Start by laying a sheet of nori shiny side down on a bamboo sushi mat.
2. Spread a thin layer of cooked sushi rice over the nori, leaving about an inch at the top.
3. Place your favorite veggies in the center. You can mix and match!
4. Carefully roll the sushi from the bottom, pressing firmly and sealing the edge with a bit of water.
5. Slice the roll into bite-sized pieces with a sharp knife for neat edges. Serve with soy sauce on the side for dipping.
Feel free to get creative! You can add protein like tofu or tempeh for an extra boost. These rolls are perfect for a quick snack, a light lunch, or even a party platter. Your friends and family will love how fresh and tasty they are!
Quick Tips for Perfect Rolls:
– Choose fresh veggies for the best flavor.
– Experiment with fillings like carrots, radishes, or even cooked shrimp.
– Practice your rolling technique to get the tightest sushi rolls.
– Serve with dipping sauces like spicy mayo for a flavor kick.
Enjoy these vibrant Veggie Sushi Rolls, and snack smart!
Veggie Sushi Rolls
Editor’s Choice

2 Pack Bamboo Sushi Rolling Mat, Sushi roll maker,Sushi making kit, Bamb…
 Amazon$4.99
Raw Organic Nori Sheets 50 qty Pack! – Certified Vegan, Raw, Kosher Sush…
 AmazonCheck Price
Soeos Premium Sushi Rice, 4 lb (2 Pack), Calrose Rice, Medium Grain, Whi…
 AmazonCheck Price
16. Savory Oatmeal with Spinach
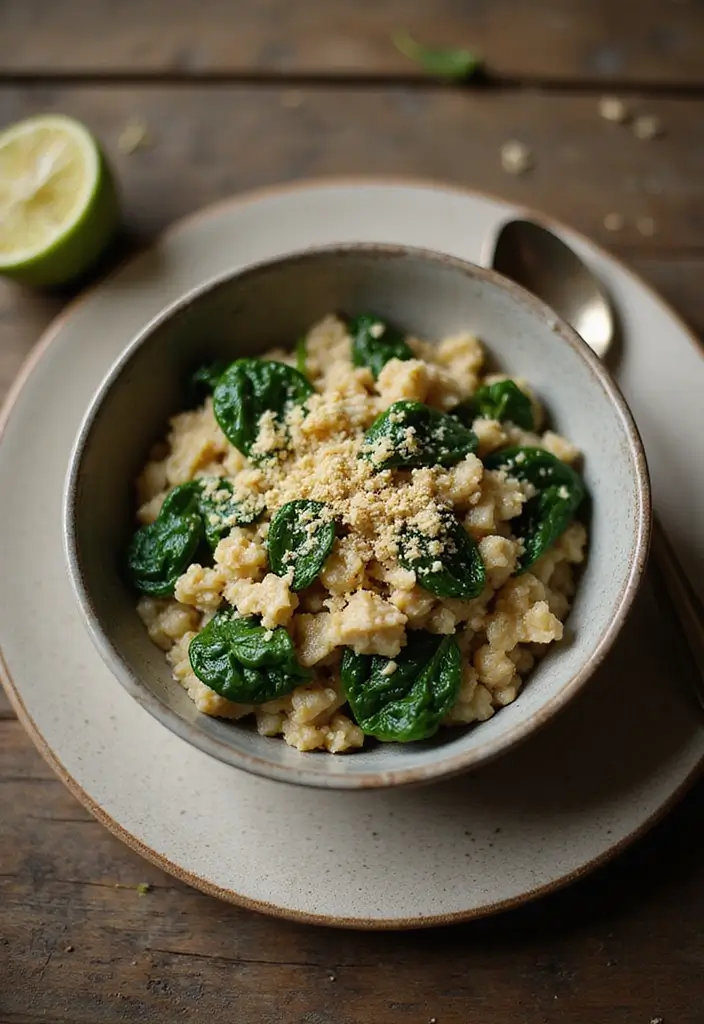
Savory oatmeal is not just a breakfast dish; it’s a comforting snack that can fit into any time of your day. Imagine a warm bowl of oatmeal, rich with nutrients and flavors. Adding fresh spinach and a sprinkle of nutritional yeast gives it a cheesy twist. This recipe is a fantastic way to revamp your ordinary oatmeal routine!
Recipe Overview
– Servings: 2
– Prep Time: 5 minutes
– Cook Time: 10 minutes
– Total Time: 15 minutes
– Calories: About 200 per serving
Nutrition Information:
– Protein: 8g
– Fat: 3g
– Carbs: 30g
– Fiber: 6g
Ingredients:
– 1 cup rolled oats
– 2 cups vegetable broth
– 1 cup fresh spinach
– 2 tablespoons nutritional yeast
– Salt and pepper, to taste
Instructions:
1. Begin by bringing the vegetable broth to a boil in a saucepan.
2. Stir in the rolled oats, lower the heat, and cook until they become soft and creamy.
3. Add the fresh spinach, cooking until it’s just wilted.
4. Mix in nutritional yeast and season with salt and pepper to taste. Serve warm and enjoy!
Want to boost the protein? Top it with a poached egg for a delicious twist!
Frequently Asked Questions:
– Can I make it sweet? Absolutely! Swap out the spinach for fruits like bananas or berries for a sweet treat.
This savory oatmeal not only fills you up but also provides a great balance of nutrients. It’s quick, easy, and perfect for a busy lifestyle. Whether you eat it for a snack or a light meal, you can’t go wrong with this hearty option.
Savory Oatmeal with Spinach
Editor’s Choice

Quaker Old Fashioned Rolled Oats, Non GMO Project Verified, Two 64oz Bag…
 Amazon$7.03
Bragg Premium Nutritional Yeast Seasoning – Vegan, Gluten Free – Good So…
 Amazon$14.99
COLLEGE INN 100% Natural Garden Vegetable Broth, 32 oz Carton (Pack of 6)
 AmazonCheck Price
17. Fruit Skewers with Yogurt Dip
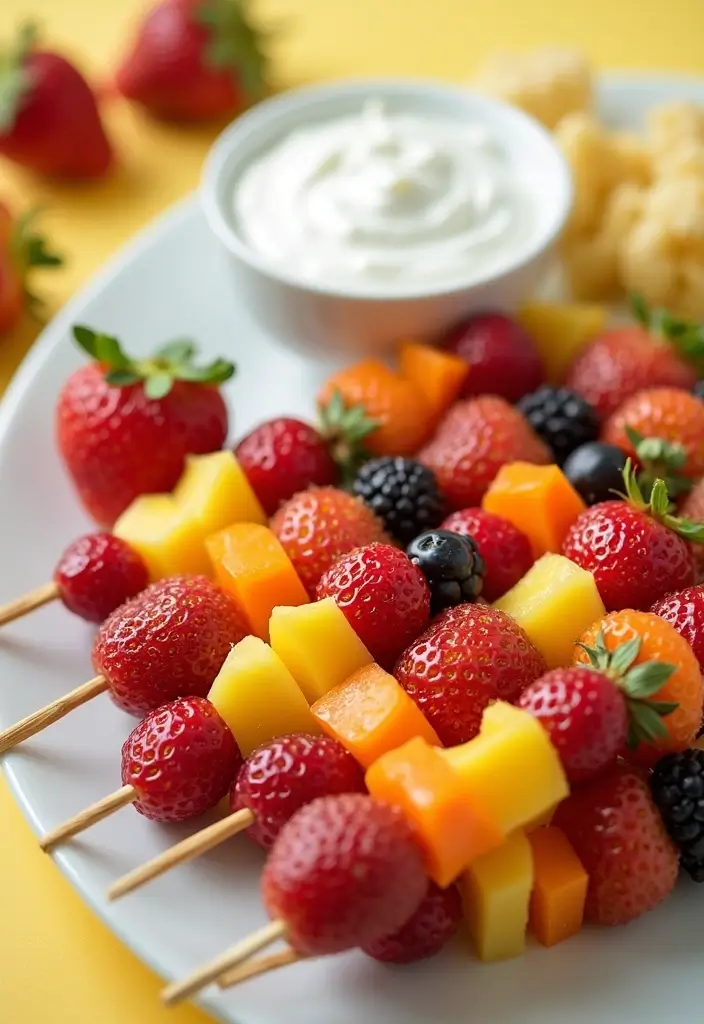
Fruit skewers are a delightful way to enjoy fresh fruits, and they look stunning too! Imagine colorful chunks of strawberries, grapes, and melons all lined up on a skewer, ready to be dipped into a creamy yogurt sauce. These skewers are not just a treat for the eyes; they are also a hit at parties and can be a fun, healthy snack for everyone, from kids to adults.
Want to whip up a batch? It’s super easy! In just 10 minutes, you can create a refreshing snack that packs a nutritional punch. Each serving is around 120 calories, making it a guilt-free indulgence. Here’s everything you need to know to make your own fruit skewers with yogurt dip.
Recipe Overview
– Servings: 4
– Prep Time: 10 minutes
– Cook Time: 0 minutes
– Total Time: 10 minutes
– Calories: Approximately 120 per serving
Nutrition Information:
– Protein: 3g
– Fat: 2g
– Carbs: 25g
– Fiber: 3g
Ingredients:
– 1 cup mixed fruits (strawberries, grapes, melons)
– 1 cup dairy-free yogurt
– 1 tablespoon maple syrup (optional)
Instructions:
1. Start by threading your mixed fruits onto the skewers. Get creative with the order!
2. In a small bowl, combine the yogurt with maple syrup if you like it sweeter. Mix well.
3. Serve the fruit skewers alongside the yogurt dip.
For added fun, use cookie cutters to create fun shapes from your fruits!
Frequently Asked Questions:
– Can I use different fruits? Yes! Feel free to swap in your favorites like pineapple or kiwi for a twist!
These fruit skewers are perfect for picnics, kids’ parties, or just a healthy snack at home. Enjoy the burst of flavors and the joy of healthy eating!
Fruit Skewers with Yogurt Dip
Editor’s Choice
![25 Healthy Snack Recipes Easy and Delicious 112 200PCS Bamboo Skewers for Appetizers, [6 Inch] Long Cocktail Picks Fancy...](https://m.media-amazon.com/images/I/71Uli4ypRZL._AC_UY218_.jpg)
200PCS Bamboo Skewers for Appetizers, [6 Inch] Long Cocktail Picks Fancy…
 Amazon$6.99
Belle + Bella Non-Dairy Vegan Yogurt Starter – Gluten Free, No Added Sug…
 Amazon$12.70
Halloween Cookie Cutters Set – 12 Pieces Stainless Steel Halloween Cooki…
 Amazon$4.99
18. Spiced Pumpkin Seeds
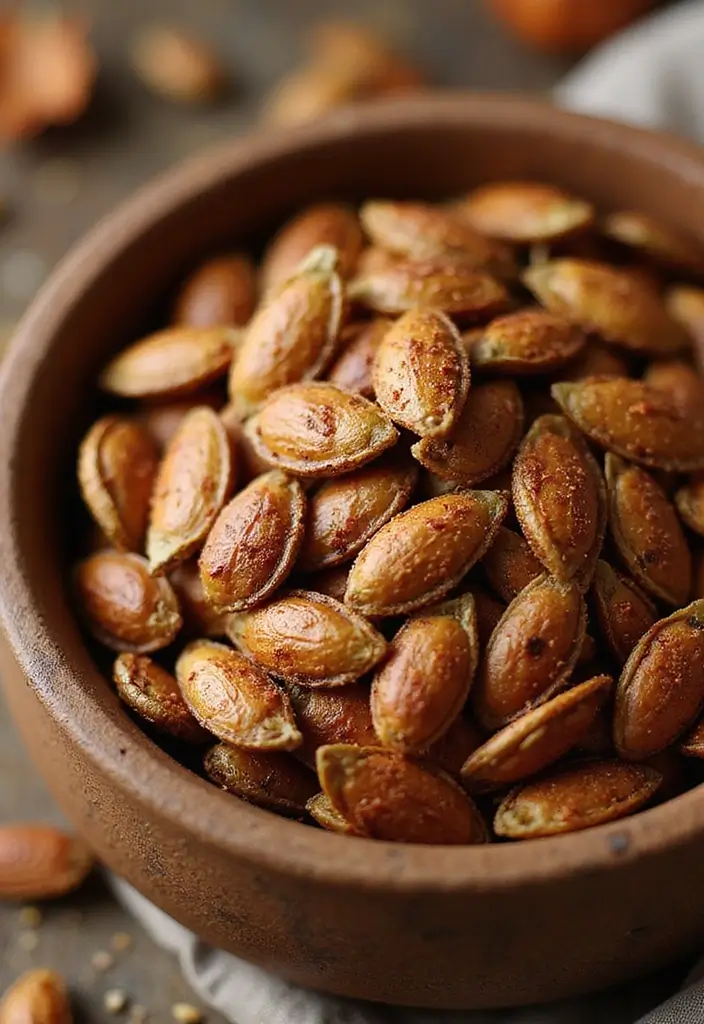
Spiced pumpkin seeds are a crunchy, satisfying snack that packs a nutritional punch. These little powerhouses are loaded with protein, making them perfect for a quick energy boost. While they shine in the fall, you can enjoy them year-round. Imagine snacking on these flavorful seeds while watching your favorite movie or as a delightful addition to your lunchbox.
Making spiced pumpkin seeds is simple and quick. In just 20 minutes, you can whip up a batch that will keep you satisfied. Plus, they’re a budget-friendly treat. So, let’s dive into this easy recipe and make something delicious!
Recipe Overview
– Servings: 4
– Prep Time: 5 minutes
– Cook Time: 15 minutes
– Total Time: 20 minutes
– Calories: Approximately 180 per serving
Nutrition Information:
– Protein: 7g
– Fat: 15g
– Carbs: 5g
– Fiber: 2g
Ingredients:
– 1 cup raw pumpkin seeds
– 1 tablespoon olive oil
– 1 teaspoon paprika
– 1/2 teaspoon cayenne pepper (optional for spice)
– Salt, to taste
Instructions:
1. Preheat your oven to 350°F (175°C).
2. In a bowl, toss the pumpkin seeds with olive oil, paprika, cayenne pepper, and salt until evenly coated.
3. Spread the seeds on a baking sheet in a single layer. Roast for 15 minutes, stirring halfway through to ensure even cooking.
4. Once they’re golden and fragrant, remove them from the oven and let them cool.
Store any leftovers in an airtight container to keep them crunchy. These seeds are versatile too! You can easily swap pumpkin seeds for sunflower seeds if you want a different flavor.
Frequently Asked Questions:
– Can I use other seeds? Yes! Feel free to experiment with sunflower seeds or even sesame seeds for a twist.
Enjoy your spiced pumpkin seeds as a snack or sprinkle them over salads for added crunch. They’re not just tasty; they can also help you stay energized throughout your day!
Spiced Pumpkin Seeds
Editor’s Choice

Moonee Natural’s Pumpkin Seeds (1 Pound), Gluten Free, Non GMO, No Shell…
 Amazon$8.99
Pompeian Robust Extra Virgin Olive Oil, Contains Polyphenols, First Cold…
 Amazon$15.64
Soeos Paprika Powder, 16 oz (Pack of 1), Sweet Paprika Seasoning for Mar…
 AmazonCheck Price
19. Almond Butter Stuffed Dates
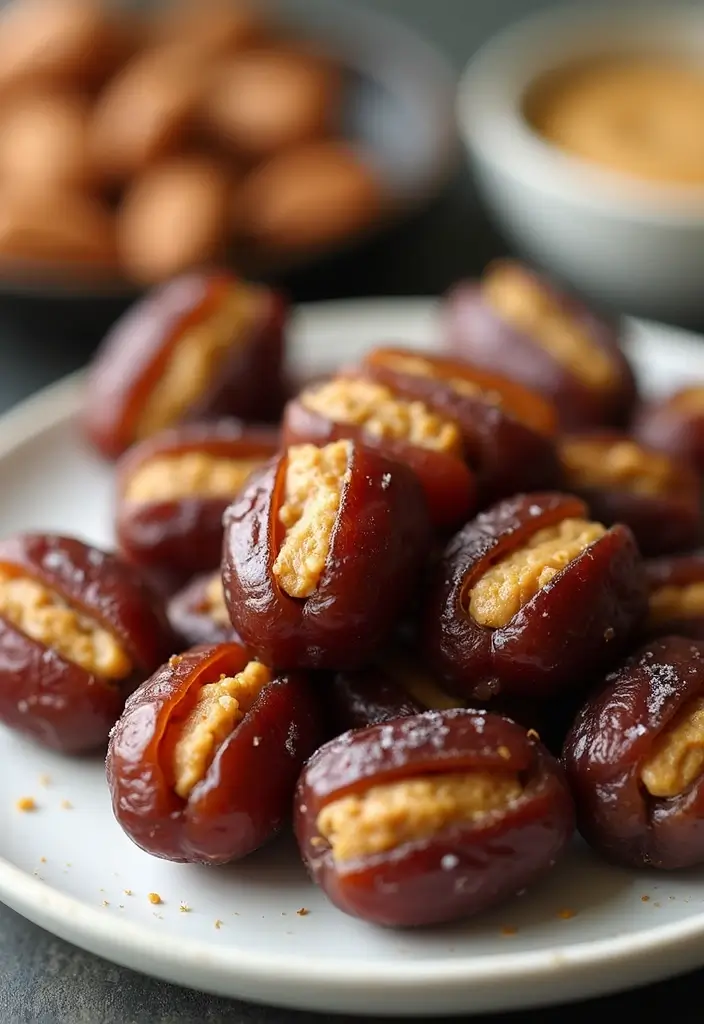
Indulge in a sweet and healthy treat with almond butter stuffed dates. These delightful bites offer a perfect mix of natural sweetness and creamy goodness. They serve as a quick energy boost, making them an ideal snack for busy days or post-workout replenishment. Plus, they take just minutes to prepare!
This simple recipe is not only satisfying but also nutritious. Each serving packs a punch with healthy fats and a touch of fiber. You’ll love how easy it is to whip them up, and you can customize them to suit your taste.
Recipe Overview
– Servings: 4
– Prep Time: 10 minutes
– Cook Time: 0 minutes
– Total Time: 10 minutes
– Calories: Approximately 200 per serving
Nutrition Information:
– Protein: 3g
– Fat: 10g
– Carbs: 30g
– Fiber: 3g
Ingredients:
– 8 Medjool dates, pitted
– 1/2 cup almond butter
– Sea salt, for sprinkling (optional)
Instructions:
1. Begin by slicing each date lengthwise, but don’t cut all the way through.
2. Use a spoon or knife to fill each date with a generous amount of almond butter.
3. If you like a little extra flavor, sprinkle some sea salt on top.
4. Serve immediately or store for later enjoyment.
For a fun twist, consider adding a few chocolate chips inside for a sweeter bite!
Frequently Asked Questions:
– Can I use different nut butters? Absolutely! Feel free to swap almond butter for any nut butter you prefer, like peanut or cashew butter.
Try these almond butter stuffed dates as a part of your snack rotation. They’re not just tasty; they also provide a healthy boost to your day. Enjoy!
Almond Butter Stuffed Dates
Editor’s Choice

Terrasoul Superfoods Organic Medjool Dates, 2 Lbs – Soft Chewy Texture |…
 Amazon$21.49
365 by Whole Foods Market, Organic Creamy Almond Butter, 16 Ounce
 Amazon$13.99
Amazon Grocery, Sea Salt, Fine Ground, 16 Oz (Previously Happy Belly, Pa…
 Amazon$2.14
20. Cucumber Canapés
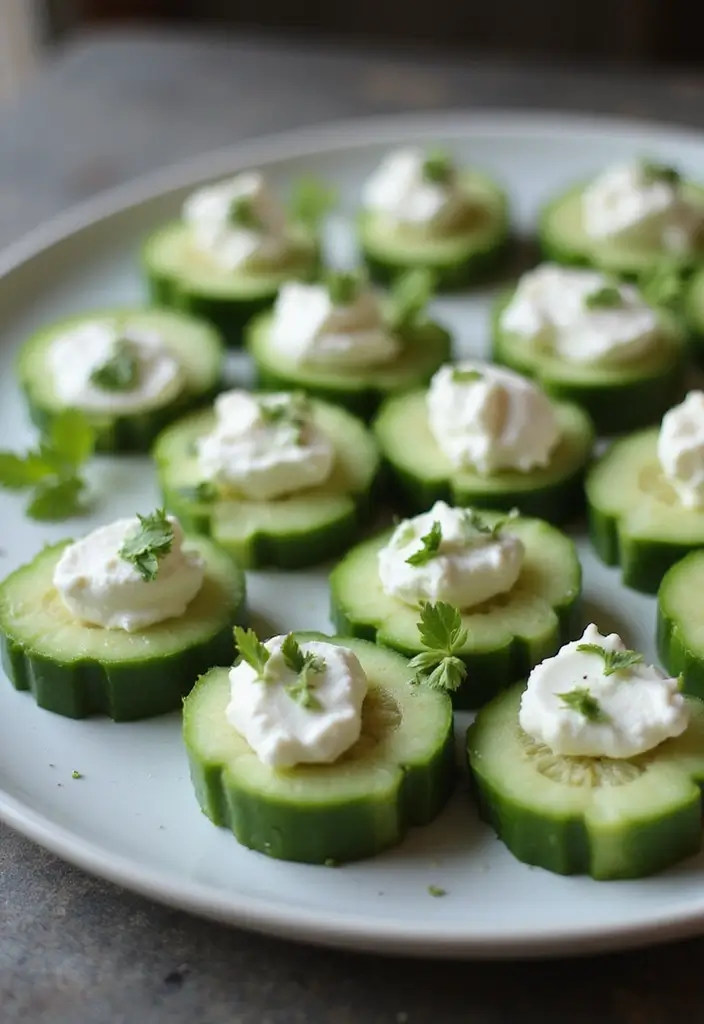
Cucumber canapés are refreshing bites that bring a burst of flavor to any event. They are light, crunchy, and topped with a creamy spread, making them a perfect snack for gatherings or casual get-togethers. Picture a warm day, friends chatting, and you serving these cool canapés. It’s a simple way to impress your guests!
Let’s talk about why these canapés are a great choice. First, they are super easy to make, taking just about 10 minutes from start to finish. You can whip them up quickly, even if you’re short on time. Plus, they’re low in calories, so you can enjoy them guilt-free.
Here’s how to make them:
Ingredients:
– 1 cucumber, sliced into rounds
– 1/2 cup dairy-free cream cheese
– Fresh herbs (like dill or chives) for garnish
Instructions:
1. Begin by slicing the cucumber into even rounds.
2. Spread a thin layer of dairy-free cream cheese on each cucumber slice.
3. Sprinkle fresh herbs on top for a burst of flavor.
4. Serve immediately and watch them disappear!
Want to spice things up? Add a slice of jalapeño on top for an extra kick!
You might be wondering, can you use regular cream cheese? Absolutely! Feel free to use what you have on hand. These canapés are versatile, delicious, and sure to make your snack table shine.
• Choose fresh cucumbers for a crisp texture.
• Pick your favorite herbs for a flavor boost.
• Add toppings like jalapeños for a spicy twist.
• Serve immediately to enjoy the crunch!
Cucumber Canapés
Editor’s Choice

Philadelphia Plant-Based Dairy Free Original Cream Cheese Spread, 8 oz Tub
 Amazon$4.99
Amazon Grocery, Organic Dill, 0.5 Oz (Previously Fresh Brand, Packaging …
 Amazon$1.50
PrepSolutions Adjust-A-Slice Mandoline Slicer, Green – Adjustable Thickn…
 Amazon$17.14
21. Carrot Sticks with Tahini Dip
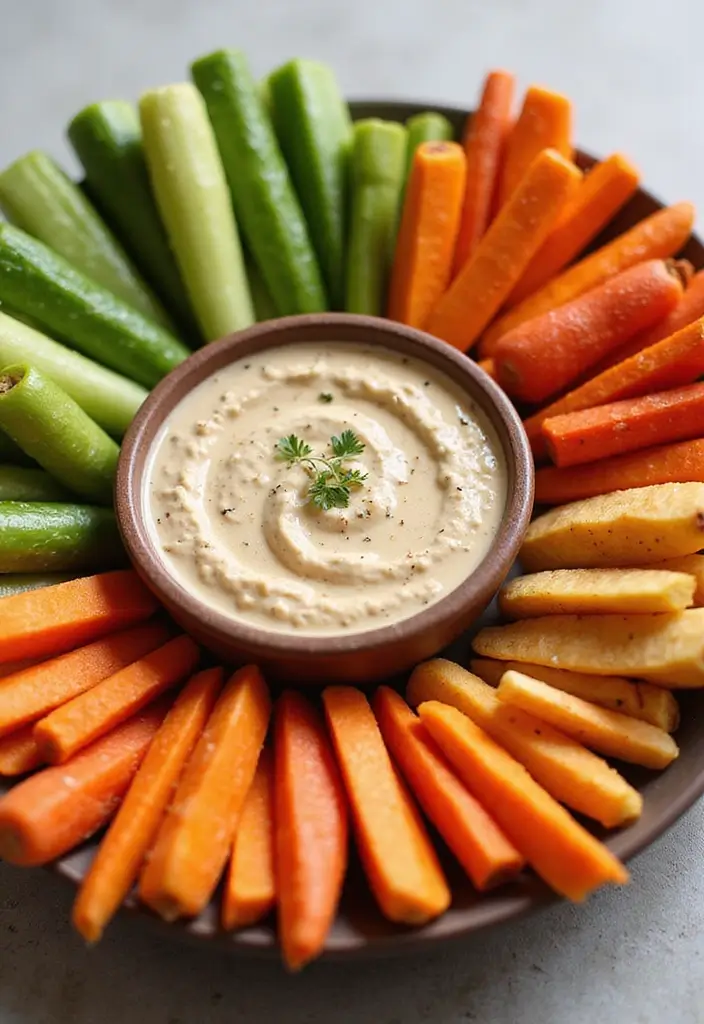
Carrot sticks with tahini dip are a crunchy snack that you can enjoy any time. They’re not just healthy; they’re also incredibly satisfying. The creamy, nutty tahini complements the natural sweetness of the carrots, creating a delightful flavor combination. You’ll love how easy this snack is to prepare!
Let’s get right into the recipe. You’ll need just a few ingredients, and in about five minutes, you’ll have a tasty treat ready to go. This snack is perfect for busy days, movie nights, or even a quick pick-me-up in the afternoon. Plus, it’s a great way to add some extra veggies to your diet without feeling deprived.
Here’s what you need:
– 4 large carrots, cut into sticks
– 1/4 cup tahini
– 1 tablespoon lemon juice
– Salt, to taste
Follow these simple steps:
1. In a mixing bowl, combine the tahini, lemon juice, and salt. Stir until the mixture is smooth and creamy.
2. Serve the tahini dip alongside the carrot sticks for a delicious dipping experience.
Want to kick it up a notch? You can add a pinch of garlic powder or your favorite spices to the tahini for added flavor.
Common Questions:
– Can I use other veggies? Absolutely! Veggies like celery or bell peppers also make great dippers.
This snack not only tastes good but also keeps you feeling full. With only about 80 calories per serving, it’s a guilt-free choice. So grab those carrots and tahini, and enjoy a healthy snack that’s as fun to eat as it is to make!
Carrot Sticks with Tahini Dip
Editor’s Choice


Umite Chef Mixing Bowls with Airtight Lids Set, 8PCS Stainless Steel Kha…
 Amazon$29.99
22. Baked Apple Chips
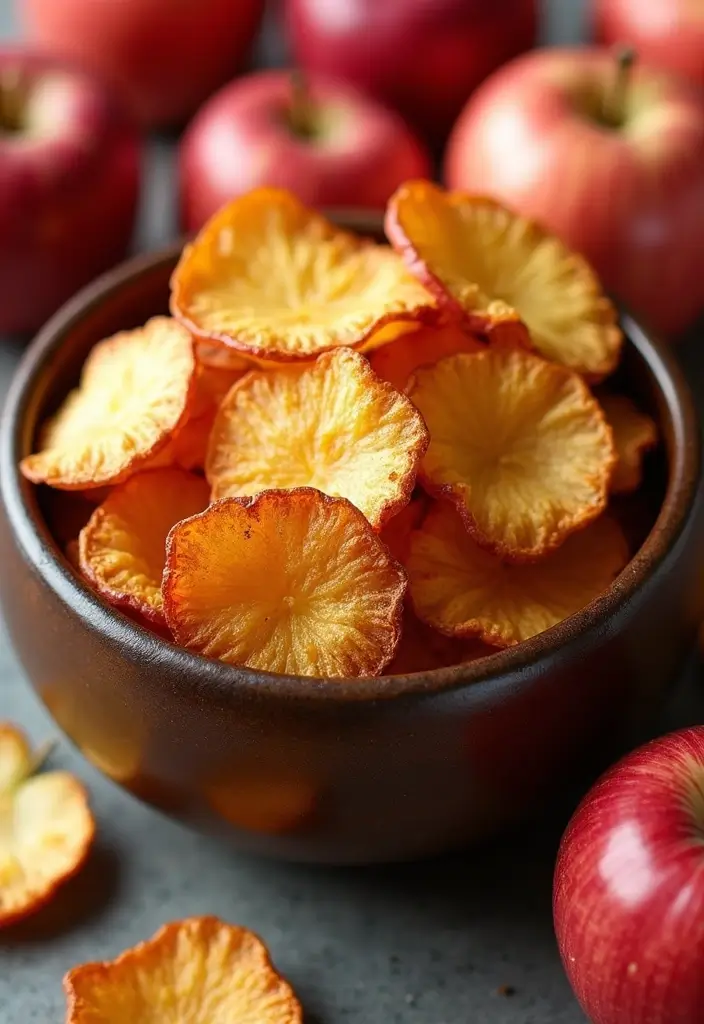
Baked apple chips are an amazing snack that satisfies your sweet cravings without the extra sugar. They’re crispy, naturally sweet, and oh-so-easy to make! Imagine biting into a crunchy chip that tastes like fall. Perfect for kids and adults alike, these chips give you a healthy alternative to traditional snacks.
Making baked apple chips only takes a few simple steps. You can enjoy them as a quick snack on the go, or serve them at your next gathering. Plus, they are budget-friendly, making them a great choice for everyone. Let’s dive into the recipe!
Recipe Overview
– Servings: 4
– Prep Time: 10 minutes
– Cook Time: 2 hours
– Total Time: 2 hours
– Calories: Approximately 100 per serving
Nutrition Information:
– Protein: 0g
– Fat: 0g
– Carbs: 25g
– Fiber: 3g
Ingredients:
– 4 apples (any variety you love)
– Cinnamon, for sprinkling
Instructions:
1. Preheat your oven to 200°F (95°C).
2. Slice the apples thinly using a mandoline for uniform chips.
3. Arrange the apple slices on a baking sheet lined with parchment paper.
4. Lightly sprinkle cinnamon over the slices for extra flavor.
5. Bake for 2 hours, flipping the chips halfway through for even crispiness.
After baking, let them cool and store in an airtight container to keep them crispy.
Frequently Asked Questions:
– Can I use a dehydrator? Yes, a dehydrator works wonderfully for making apple chips!
Now you have a delicious, healthy snack ready to enjoy anytime! These baked apple chips are not only simple to make but also a fantastic way to indulge your sweet tooth without guilt. Enjoy them at home, on road trips, or pack them in lunchboxes for a delightful surprise!
Baked Apple Chips
Editor’s Choice

Gramercy Adjustable Mandoline Food Slicer, Mandoline Slicer for Kitchen,…
 Amazon$42.95
200Pcs Parchment Paper,12×16 Inches Non-Stick Precut Parchment Paper She…
 Amazon$9.89
COSORI Food Dehydrator, Bigger Than 7 Trays With Large 6.5″ Drying Space…
 Amazon$149.99
23. Cabbage Wraps with Avocado
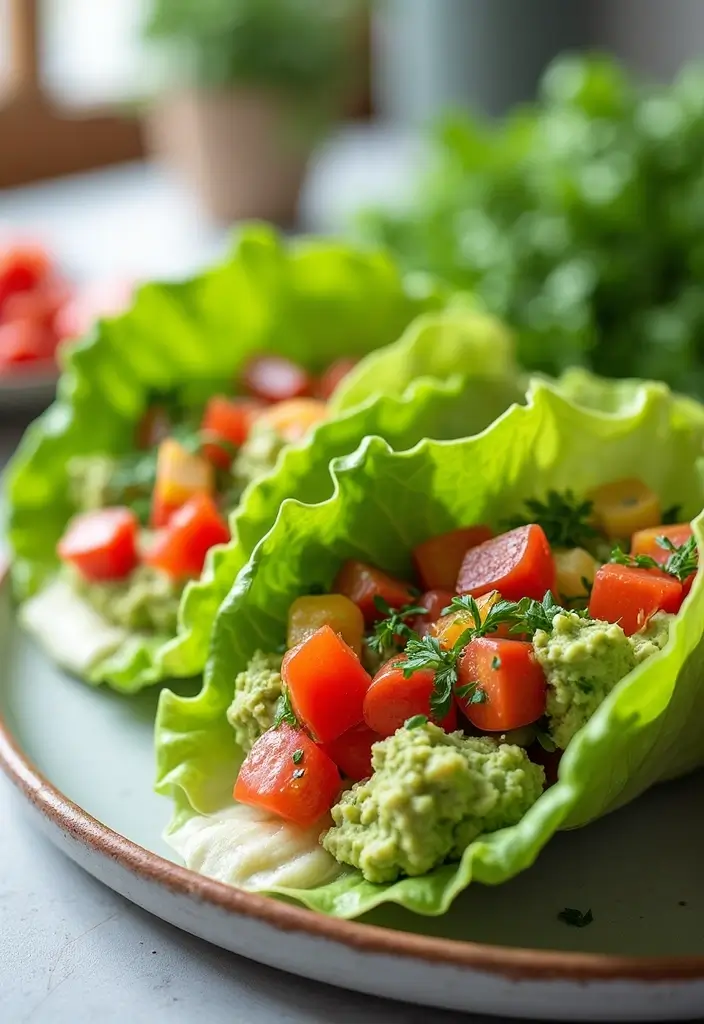
Cabbage wraps with avocado are your new go-to snack! They are not just delicious but also low in carbs and perfect for a light bite. Imagine biting into a crisp cabbage leaf filled with creamy avocado and fresh veggies. It’s a refreshing combination that will keep you satisfied without weighing you down.
In just 10 minutes, you can whip up this easy snack that serves four. It’s perfect for busy days when you need something quick and healthy. Plus, each serving is around 100 calories, making it a guilt-free treat you can enjoy anytime.
Here’s how to make them:
Ingredients:
– 4 large cabbage leaves
– 1 ripe avocado, mashed
– Sliced veggies (like bell peppers, cucumbers, and carrots)
– Lime juice, to taste
Instructions:
1. Start by laying the cabbage leaves flat on a clean surface.
2. Spread a generous amount of mashed avocado in the center of each leaf.
3. Next, add your favorite sliced veggies on top.
4. Squeeze a bit of lime juice over the filling for that extra zing.
5. Roll the cabbage leaf tightly around the filling. If needed, use a toothpick to secure it.
These wraps are perfect for meal prep! You can make them ahead of time and grab them when you’re on the go.
Frequently Asked Questions:
– Can I add protein? Absolutely! Grilled tofu or chickpeas are great choices to make your wraps more filling.
Now you have a healthy snack that’s easy to make, tasty, and packed with nutrients. Enjoy your cabbage wraps anytime you need a quick pick-me-up!
In just 10 minutes, you can whip up these cabbage wraps with avocado—serving four at about 100 calories each. Low in carbs and vegan, they’re a delicious, practical snack that keeps you full without slowing you down.
Cabbage Wraps with Avocado
Editor’s Choice

Reusable Food Bags, 12 Pack 100% Silicone Food Storage Bags Stand Up Zip…
 Amazon$39.99
24. Tomato Basil Bruschetta
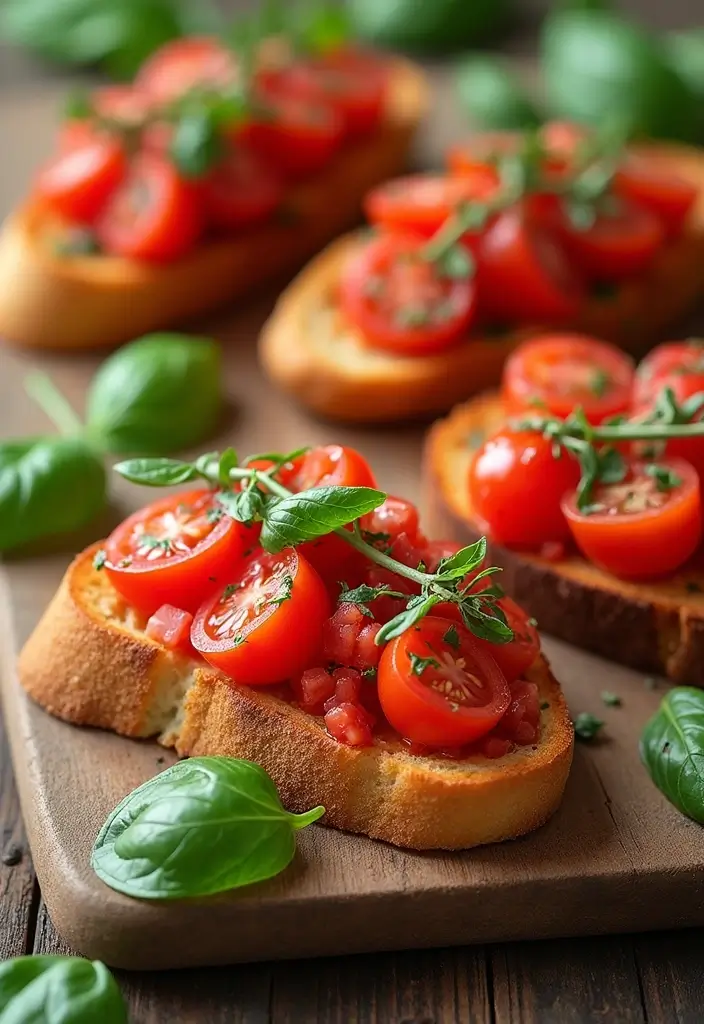
Imagine biting into a crispy slice of toasted baguette topped with fresh tomatoes and fragrant basil. That’s the magic of tomato basil bruschetta! This delightful snack is light, refreshing, and packed with flavor, making it a perfect choice for gatherings or a simple treat at home.
Making this dish is quick and easy. In just 20 minutes, you can whip up a crowd-pleasing appetizer that feels gourmet. Plus, it’s a great way to showcase ripe tomatoes during the summer months. Let’s dive into how you can create this delicious snack.
Recipe Overview
– Servings: 4
– Prep Time: 10 minutes
– Cook Time: 10 minutes
– Total Time: 20 minutes
– Calories: Approximately 150 per serving
Nutrition Information:
– Protein: 3g
– Fat: 5g
– Carbs: 20g
– Fiber: 2g
Ingredients:
– 4 slices of baguette
– 2 large tomatoes, diced
– 1/4 cup fresh basil, chopped
– 1 tablespoon balsamic vinegar
– Olive oil for drizzling
Instructions:
1. Preheat your oven to 400°F (200°C).
2. Arrange baguette slices on a baking sheet and drizzle with olive oil.
3. Toast in the oven for about 10 minutes until golden brown.
4. In a bowl, mix together the diced tomatoes, chopped basil, and balsamic vinegar.
5. Once the bread is toasted, spoon the tomato mixture generously on top of each slice.
6. Serve immediately and enjoy!
Want to make it even creamier? Add a sprinkle of vegan cheese on top for a delightful twist.
Frequently Asked Questions:
– Can I use other herbs? Yes! Cilantro or parsley can be fantastic substitutes for a unique flavor.
– What about using different types of bread? Feel free to experiment with sourdough or ciabatta for an exciting variation.
This bruschetta is not only delicious but also a vibrant addition to any snack table. It’s a simple way to impress guests and enjoy healthy eating at the same time!
Tomato Basil Bruschetta
Editor’s Choice

Hoan The Original Bagel Guillotine Universal Slicer, Silver, 9.25-Inch -…
 Amazon$14.99
AOZITA 17oz Glass Olive Oil Bottle Dispenser – 500ml Green Oil and Vineg…
 Amazon$9.99
25. Apple Banana Smoothie
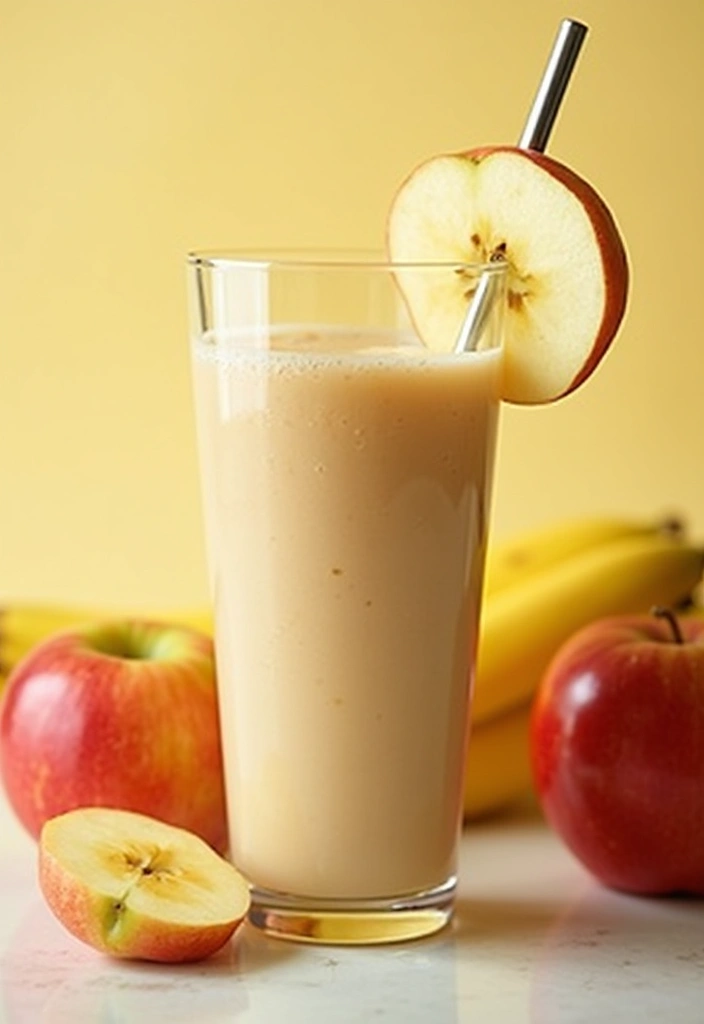
Are you looking for a quick and healthy snack that’s both delicious and easy to make? Look no further than this refreshing Apple Banana Smoothie. It’s a fantastic way to kickstart your day or enjoy a nutritious treat anytime. With its natural sweetness and creamy texture, this smoothie is perfect for busy mornings when you need something quick yet satisfying.
Recipe Overview
– Servings: 2
– Prep Time: 5 minutes
– Cook Time: 0 minutes
– Total Time: 5 minutes
– Calories: Approximately 150 per serving
Nutrition Information:
– Protein: 2g
– Fat: 2g
– Carbs: 30g
– Fiber: 4g
Ingredients:
– 1 apple, cored and chopped
– 1 banana, sliced
– 1 cup almond milk
– 1 tablespoon honey or maple syrup (optional)
– Ice cubes (optional)
Instructions:
1. Start by adding the chopped apple, sliced banana, and almond milk into a blender.
2. If you like it sweeter, drizzle in the honey or maple syrup.
3. Blend everything until it’s smooth. If you want a chilled version, toss in some ice cubes and blend again.
4. Pour the smoothie into two glasses and enjoy!
Want to boost the nutrition even further? Try adding a handful of spinach or kale. You won’t even taste it, but you’ll get extra vitamins!
Frequently Asked Questions:
– Can I use other fruits?
Absolutely! Feel free to mix in your favorite fruits like berries or mango for a different flavor.
This smoothie not only tastes great but also fuels your body with wholesome ingredients. It’s a win-win for your health!
Fun fact: Apple Banana Smoothies can pack 7–8 g of fiber per serving, helping you stay fuller longer. A 5-minute blend fuels busy mornings with natural sweetness and healthy snack recipes easy to enjoy on the go.
Apple Banana Smoothie
Editor’s Choice

Ninja BL660 Professional Compact Smoothie & Food Processing Blender, 110…
 Amazon$99.99
7 in 1 Nut Milk Maker Machine 28oz Automatic Almond Milk Maker for Homem…
 Amazon$56.99
Conclusion
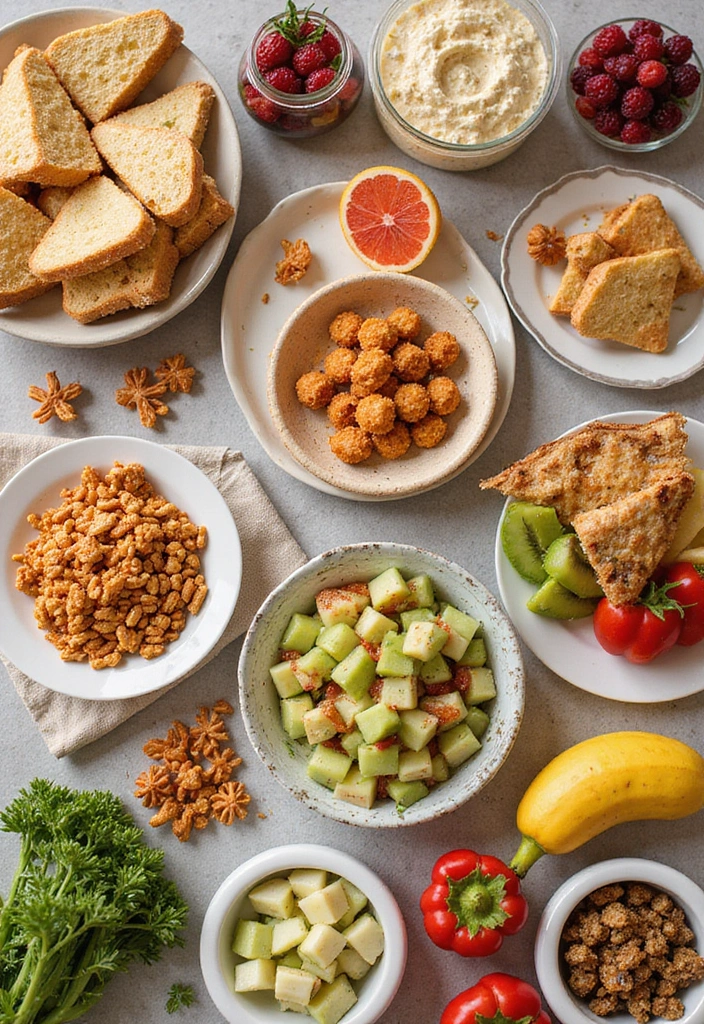
Healthy snacking doesn’t have to be boring or bland! With these 25 easy and delicious vegan recipes, you can enjoy a variety of flavorful and satisfying bites that will keep you energized throughout the day. Whether you’re whipping them up for yourself or sharing with friends, these snacks are sure to impress. So, grab your ingredients, get creative in the kitchen, and remember to enjoy every bite of your healthy journey!
Note: We aim to provide accurate product links, but some may occasionally expire or become unavailable. If this happens, please search directly on Amazon for the product or a suitable alternative.
This post contains Amazon affiliate links, meaning I may earn a small commission if you purchase through my links, at no extra cost to you.
Frequently Asked Questions
What Are Some Quick Healthy Snacks I Can Prepare at Home?
If you’re looking for quick healthy snacks, you’re in luck! Try making energy balls with oats, nut butter, and a touch of honey. Or whip up some veggie sticks with hummus for a crunchy, nutritious option. Another easy idea is yogurt parfaits layered with fruits and nuts. These snacks are not only simple but also delicious and filling!
Can You Share Some Nutritious Snack Ideas for Kids?
Absolutely! When it comes to kids, nutritious snack ideas can make healthy eating fun. Consider making fruit skewers with colorful fruits, or prepare homemade trail mix with nuts, seeds, and dried fruits. Another hit is peanut butter banana bites—just slice bananas, spread some peanut butter, and enjoy! These snacks are sure to keep energy levels up and kids happy.
How Can I Make Healthy Eating a Habit with Easy Healthy Recipes?
Making healthy eating a habit starts with incorporating easy healthy recipes into your routine. Focus on planning meals that include whole foods, like salads, smoothies, and stir-fries. Set aside a few hours each week for meal prep to have healthy snacks and meals ready to go. You’ll find that having simple snack options at your fingertips makes it much easier to choose healthy!
What Should I Look for When Choosing Simple Snack Options?
When selecting simple snack options, aim for choices that are nutrient-dense rather than calorie-dense. Look for snacks that balance protein, healthy fats, and fiber, as these will keep you fuller for longer. Avoid snacks with added sugars and artificial ingredients. Think along the lines of nuts, fresh fruits, or whole grain crackers paired with dips like guacamole or hummus!
How Can I Incorporate Healthy Snack Recipes Easy into My Busy Lifestyle?
Incorporating healthy snack recipes easy into a busy lifestyle is all about planning and preparation! Try batch-cooking snacks on weekends, like baked chickpeas or oatmeal muffins. Keep a stash of pre-portioned snacks in your bag or at your desk. This way, you’ll always have healthy choices on hand when hunger strikes, making it easier to stick to your healthy eating goals!
Related Topics
healthy snack recipes easy
vegan snacks
quick healthy snacks
nutritious snack ideas
easy healthy recipes
simple snack options
5-minute snacks
plant-based snacks
low-calorie treats
healthy eating tips
snack prep
guilt-free indulgence

