If you’ve ever found yourself staring into your pantry, wishing for a salty snack that won’t leave you feeling bloated or guilty, you’re not alone. The struggle for tasty gluten-free snacks can be real. Whether you’re living with gluten intolerance, celiac disease, or just trying to eat healthier, finding satisfying options can feel overwhelming. That’s why I created this post. I want to help you satisfy those snack cravings without the gluten.
This collection of 27 gluten-free salty snack recipes is perfect for anyone who loves delicious, satisfying treats. If you enjoy snacking while binge-watching your favorite show, need something quick for a road trip, or want to impress friends at a gathering, this post is for you. You don’t have to settle for bland rice cakes or overly complicated recipes. These snacks are designed for people like you who crave flavor and convenience.
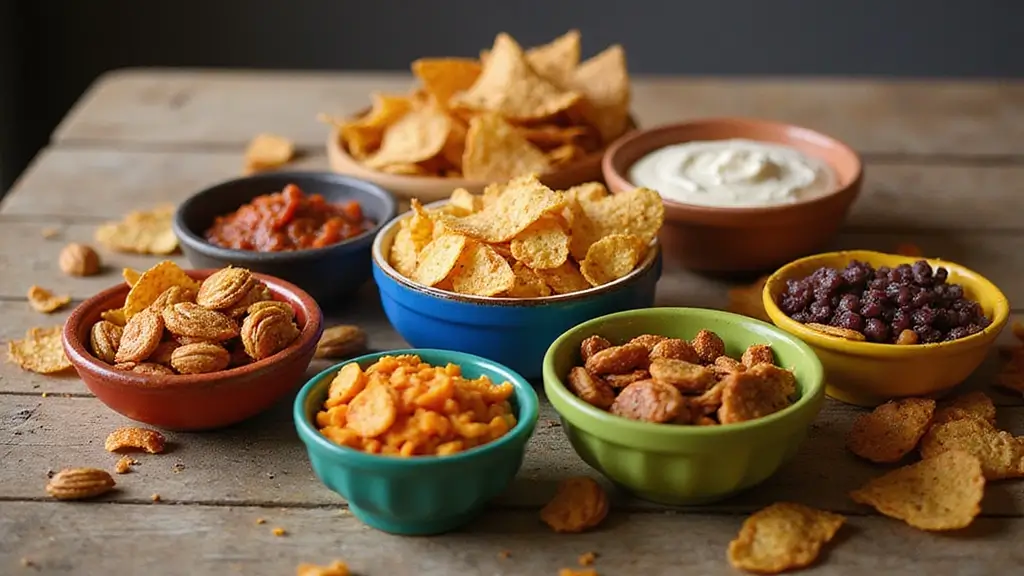
In this post, you’ll discover a variety of recipes that are not only gluten-free but also packed with flavor and texture. From crunchy chips to flavorful bites, I’ve pulled together options that will please your taste buds and keep your energy up. You’ll find simple recipes that require minimal ingredients and can be whipped up in no time.
Get ready to dive into snacks that are tasty, easy to make, and perfect for any occasion. Each recipe is designed to curb those cravings without compromising your dietary needs. Say goodbye to boring snacks and hello to fun, flavorful bites that you can feel good about eating. Let’s get snacking!
1. Spicy Roasted Chickpeas

Craving a crunchy snack that hits just the right spot? Look no further than these Spicy Roasted Chickpeas! They’re not only gluten-free but also packed with protein, making them a smart choice for your snack time. With a little kick from cayenne pepper, these chickpeas deliver a spicy punch that’s hard to resist. Enjoy them while watching your favorite game or toss some in your lunchbox for a tasty boost.
Making these spicy bites is simple and fun. You can easily adjust the heat to match your taste preference. For a milder flavor, use less cayenne pepper. Just imagine munching on these crunchy nuggets, feeling satisfied without the guilt. Plus, they’re high in fiber, ensuring you stay full without feeling weighed down.
Here’s how to make your own Spicy Roasted Chickpeas:
Recipe Overview:
– Servings: 4
– Prep Time: 10 minutes
– Cook Time: 30 minutes
– Total Time: 40 minutes
– Calories: 120 per serving
Ingredients:
– 1 can (15 oz) chickpeas, drained and rinsed
– 1 tablespoon olive oil
– 1 teaspoon garlic powder
– 1 teaspoon paprika
– 1/2 teaspoon cayenne pepper (adjust to taste)
– Salt to taste
Instructions:
1. Preheat your oven to 400°F (200°C).
2. Pat the drained chickpeas dry with a towel.
3. Toss the chickpeas in a bowl with olive oil, garlic powder, paprika, cayenne pepper, and salt.
4. Spread them out in a single layer on a baking sheet.
5. Roast in the oven for 30 minutes, shaking the pan halfway through for even cooking.
6. Once done, let them cool for a few minutes. Enjoy the crunch!
Tips:
– For extra crunch, leave them in the oven a bit longer after turning it off.
– Experiment with spices like cumin or chili powder for new flavors.
FAQ:
– How long do roasted chickpeas last?
Enjoy them fresh for the best taste, but they can last up to a week in an airtight container.
Try these Spicy Roasted Chickpeas today for a snack that’s both delicious and nutritious! You won’t regret it.
Game days deserve crunch and flavor, not fuss. Spicy Roasted Chickpeas pull double duty as gluten free salty snack recipes that are easy to share, protein-packed, and punchy enough to keep your crew cheering.
Spicy Roasted Chickpeas
Editor’s Choice

Cosori 9-in-1 TurboBlaze Air Fryer 6 Qt, Premium Ceramic Coating, 90°–45…

BIENA Chickpea Snacks – Crunchy Roasted Chickpeas – High Fiber Vegan Pro…

Spice Rack Kitchen Cabinet Organizer- 3 Tier Bamboo Expandable Display S…
2. Gluten-Free Nachos

Craving a satisfying snack that’s both delicious and gluten-free? Look no further than gluten-free nachos! These crispy bites are perfect for game day or any gathering. With gluten-free tortilla chips as your base, you can pile on all your favorite toppings. Think gooey melted cheese, fresh jalapeños, and creamy guacamole. Not only are they easy to prepare, but you can also make them your own by adding proteins or veggies.
Imagine serving a vibrant platter of nachos, ready to share with friends and family. They’ll love the crunch and flavor, making it an instant hit!
Here’s how to whip up your very own gluten-free nachos:
Recipe Overview:
– Servings: 4
– Prep Time: 10 minutes
– Cook Time: 10 minutes
– Total Time: 20 minutes
– Calories: 300 per serving
Ingredients:
– 1 bag of gluten-free tortilla chips
– 2 cups shredded cheese (cheddar or Mexican blend)
– 1 can black beans, rinsed and drained
– 1 jalapeño, sliced
– 1 avocado, diced
– Salsa for serving
Instructions:
1. Preheat your oven to 350°F (175°C).
2. Spread the tortilla chips evenly on a baking sheet.
3. Sprinkle cheese and black beans over the chips.
4. Add jalapeño slices on top.
5. Bake for 10 minutes, until the cheese is melted and bubbly.
6. Serve hot, topped with diced avocado and salsa.
Want to elevate your nachos?
– Experiment with different cheeses for unique flavors.
– Add a squeeze of lime juice right before serving for a zesty kick.
FAQ:
– Can I make nachos ahead of time?
It’s best to prepare them just before serving to keep the chips crispy and fresh.
Enjoy making these nachos! They’re sure to be the star of your next snack time.
Gluten-Free Nachos
Editor’s Choice

Late July Sea Salt Organic Tortilla Chips, 10.1 Oz Bag

Amazon Grocery, Mexican-Style Four Cheese Blend, Finely Shredded, 16 Oz …

Nostalgia Taco Tuesday 2-Speed Chopper, Perfect For Salsa, Guacamole, Di…
3. Cauliflower Buffalo Wings

Craving something crispy and spicy? These Cauliflower Buffalo Wings are your answer! They give you all the flavor of traditional buffalo wings but with a healthy twist. Baked until perfectly crispy and coated in zesty buffalo sauce, they’ll leave you feeling satisfied without the guilt. Perfect for game day or a cozy night in, these bites are sure to impress your friends and family.
Making these wings is a breeze! You’ll whip them up in just 45 minutes. Serve them with a creamy ranch or blue cheese dip, and watch your guests keep coming back for more. Who knew healthy snacks could taste this good?
Recipe Overview:
– Servings: 4
– Prep Time: 15 minutes
– Cook Time: 30 minutes
– Total Time: 45 minutes
– Calories: 150 per serving
Ingredients:
– 1 head of cauliflower, cut into florets
– 1 cup gluten-free flour (or almond flour)
– 1 cup water
– 1 teaspoon garlic powder
– 1 teaspoon onion powder
– 1/2 teaspoon salt
– 1 cup buffalo sauce
– Optional: ranch or blue cheese for dipping
Instructions:
1. Preheat your oven to 450°F (230°C).
2. In a bowl, mix the flour, water, garlic powder, onion powder, and salt until smooth.
3. Dip each cauliflower floret into the batter, then arrange them on a baking sheet lined with parchment paper.
4. Bake for 20 minutes until golden brown.
5. Toss the baked cauliflower in buffalo sauce.
6. Return them to the oven for another 10 minutes.
7. Serve hot with your choice of dipping sauce.
Want them spicier? Just add more buffalo sauce! For an extra crispy finish, broil them for the last few minutes of baking.
FAQ:
– Can I use frozen cauliflower? Fresh is best, but thawed frozen works too!
These Cauliflower Buffalo Wings will transform your snack game. Enjoy this guilt-free delight anytime you want a savory treat!
Cauliflower Buffalo Wings
Editor’s Choice

King Arthur Measure for Measure Gluten-Free Flour: All-Purpose 1:1 Subst…

Buffalo Wild Wings Medium Buffalo Sauce, 12 fl. oz., Perfect Dipping Sau…

200Pcs Parchment Paper,12×16 Inches Non-Stick Precut Parchment Paper She…
4. Zucchini Chips

Looking for a crunchy snack that satisfies your salty cravings? Try these zucchini chips. They’re not just a healthy alternative to potato chips; they’re also easy to make and full of flavor. Picture this: thin, crispy slices of zucchini seasoned just right, giving you that perfect crunch. You can customize them with your favorite spices, like garlic powder or tangy parmesan. These chips are a hit at parties and a sneaky way to add veggies to your game-day spread.
Here’s how to whip them up:
Recipe Overview:
– Servings: 4
– Prep Time: 10 minutes
– Cook Time: 2 hours
– Total Time: 2 hours 10 minutes
– Calories: 100 per serving
Ingredients:
– 2 medium zucchinis
– 1 tablespoon olive oil
– 1 teaspoon garlic powder
– 1 teaspoon salt
– Optional: grated parmesan cheese
Instructions:
1. Preheat your oven to 225°F (110°C).
2. Slice the zucchinis thinly and place them in a bowl.
3. Drizzle with olive oil, sprinkle garlic powder and salt, then toss to combine.
4. Lay the zucchini slices on a baking sheet in a single layer.
5. Bake for 2 hours, flipping them halfway until they are perfectly crispy.
6. Let them cool before digging in!
To keep your leftovers fresh, store them in an airtight container for 1-2 days. For even slices, consider using a mandoline slicer.
FAQ:
– Why are my zucchini chips not crispy? Make sure you slice them thinly and space them well on the baking sheet for the best results.
With these zucchini chips, you’ll have a guilt-free snack that’s both tasty and nutritious. Perfect for movie nights or casual get-togethers, they bring a fun twist to traditional snacking. Enjoy the crunch!
Zucchini Chips
Editor’s Choice

OXO Good Grips Handheld Mandoline Slicer for Kitchen, Adjustable Vegetab…

Airtight Food Storage Containers with Lids, Vtopmart 24 pcs Plastic Kitc…

5. Cheese Stuffed Mini Peppers

Craving a tasty snack that’s also gluten-free? Look no further than these cheese-stuffed mini peppers. Bright, colorful, and bursting with flavor, they make a delightful addition to any gathering. Kids and adults alike will love the creamy filling that hides inside these sweet little peppers. The best part? You can mix and match your favorite cheeses to create a filling that suits your taste buds perfectly.
Picture these vibrant peppers on your snack table, ready to impress. You can serve them warm right out of the oven or cold for a refreshing treat. This flexibility makes them perfect for parties, game days, or even a cozy family movie night.
Ready to make your own? Here’s a quick recipe for Cheese Stuffed Mini Peppers:
Recipe Overview:
– Servings: 6
– Prep Time: 15 minutes
– Cook Time: 15 minutes
– Total Time: 30 minutes
– Calories: 200 per serving
Ingredients:
– 12 mini sweet peppers
– 8 oz cream cheese, softened
– 1 cup shredded cheese (cheddar or mozzarella)
– 1 teaspoon garlic powder
– Salt and pepper to taste
– Fresh herbs for garnish (optional)
Instructions:
1. Preheat your oven to 375°F (190°C).
2. Cut the tops off the mini peppers and remove the seeds.
3. In a bowl, combine the cream cheese, shredded cheese, garlic powder, salt, and pepper until smooth.
4. Stuff the mixture into each mini pepper until filled.
5. Arrange the stuffed peppers on a baking sheet and bake for 15 minutes.
6. Garnish with fresh herbs before serving.
Want to kick up the flavor? Add cooked bacon bits to your cheese mixture for an extra savory touch. You can even prepare these ahead of time and store them in the fridge until it’s time to bake.
FAQ:
– Can I use a different type of pepper?
Yes! Try jalapeños for a spicy twist.
Enjoy these delightful cheese-stuffed mini peppers at your next get-together, and watch them disappear in no time!
Cheese Stuffed Mini Peppers
Editor’s Choice


Good Culture Organic Classic Cottage Cheese, 16 oz
Amazon Grocery, Mexican-Style Four Cheese Blend, Finely Shredded, 16 Oz …
6. Guacamole and Plantain Chips

Guacamole with plantain chips is a dream snack that everyone will love. The smooth, creamy guacamole pairs perfectly with the crunchy, salty plantain chips. This combo is not just tasty; it’s a hit at parties, especially during game day. Just imagine your friends dipping those crispy chips into the fresh guacamole. It’s a delightful way to satisfy those afternoon cravings!
Making guacamole is quick and easy. You can also personalize it by adding fun ingredients like diced tomatoes, onions, or even some zesty jalapeños for extra flavor. This dish is nutritious too, thanks to the healthy fats from avocados.
Here’s how to make this delightful snack:
Recipe Overview:
– Servings: 4
– Prep Time: 10 minutes
– Cook Time: 10 minutes (for chips)
– Total Time: 20 minutes
– Calories: 250 per serving
Ingredients:
For Guacamole:
– 2 ripe avocados
– 1 lime, juiced
– 1 small onion, finely diced
– 1 tomato, diced
– Salt to taste
For Plantain Chips:
– 2 green plantains
– Oil for frying
– Salt to taste
Instructions:
1. Begin by mashing the avocados in a bowl.
2. Mix in lime juice, diced onion, tomato, and salt until blended.
3. Next, peel and slice the plantains thinly.
4. Heat oil in a pan over medium heat. Fry the plantain slices until they turn golden brown.
5. Remove the chips from the oil, drain on paper towels, and sprinkle with salt.
6. Serve your delicious guacamole alongside the warm plantain chips.
Tips:
– To keep guacamole fresh, press plastic wrap directly onto its surface before refrigerating.
– Want a spicy kick? Add diced jalapeños to your guacamole mix!
FAQ:
– Can I bake the plantain chips instead?
Yes, you can bake them at 400°F (200°C) for 20-25 minutes for a healthier option.
This simple and flavorful snack will impress your guests and keep everyone coming back for more!
Guacamole and Plantain Chips
Editor’s Choice


Iberia Maduritos Naturally Sweet Plantain Chips, 20 Ounce (Pack of 2)
7. Savory Gluten-Free Crackers

Craving a crunchy snack that fits your gluten-free lifestyle? Savory gluten-free crackers could be just what you need! These homemade delights are not only simple to whip up, but they’re also bursting with flavor. You can easily customize them with your favorite herbs or seeds for a personal touch. Enjoy them with dips, cheeses, or just on their own for a satisfying snack experience.
Making crackers at home is a fun and rewarding process. It’s a great way to impress your guests, and you can feel good knowing they’re healthier than many store-bought options. Plus, they’re quick to prepare, making them perfect for any occasion.
Here’s a simple recipe to get you started:
Recipe Overview:
– Servings: 8
– Prep Time: 10 minutes
– Cook Time: 20 minutes
– Total Time: 30 minutes
– Calories: 120 per serving
Ingredients:
– 1 cup gluten-free flour (almond or rice flour works well)
– 1/4 cup olive oil
– 1/4 cup water
– 1 teaspoon salt
– Optional: herbs like rosemary or thyme for flavor
Instructions:
1. Preheat your oven to 350°F (175°C).
2. In a mixing bowl, combine the gluten-free flour, olive oil, water, and salt. Stir until you have a smooth dough.
3. Roll out the dough on a floured surface until it’s thin. Cut into your desired shapes.
4. Place the crackers on a baking sheet and bake for 15-20 minutes, or until they turn golden and crispy.
5. Allow them to cool before serving, and enjoy!
Feel free to experiment with flavors. Try adding garlic powder or sesame seeds for an extra kick. Store any leftovers in an airtight container for up to a week, or freeze them for up to three months in a sealed container.
Now you have a delicious and easy snack option ready for any gathering!
Savory Gluten-Free Crackers
Editor’s Choice

King Arthur, Measure for Measure Flour, Certified Gluten-Free, Non-GMO P…

Pompeian Robust Extra Virgin Olive Oil, Contains Polyphenols, First Cold…

The Spice Lab Complete Organic Spices and Seasonings Set – 30 Jar Spice …
8. Baked Sweet Potato Fries

Baked sweet potato fries are a tasty twist on regular fries. They combine a natural sweetness with a satisfying crunch that’s hard to resist. You can enjoy them any time, whether it’s game day or a cozy night at home. Season them to your liking, from simple salt to a spicy kick.
Imagine dipping these golden fries into a zesty sauce. It’s the perfect way to elevate your snack game. Plus, they add a healthy option to your menu, making them a guilt-free indulgence.
Here’s how to whip up this delicious snack:
Recipe Overview:
– Servings: 4
– Prep Time: 10 minutes
– Cook Time: 30 minutes
– Total Time: 40 minutes
– Calories: 180 per serving
Ingredients:
– 2 large sweet potatoes
– 2 tablespoons olive oil
– 1 teaspoon paprika
– 1/2 teaspoon salt
– Optional: cayenne pepper for extra heat
Instructions:
1. Preheat your oven to 425°F (220°C).
2. Slice the sweet potatoes into fry shapes. Soak them in water for about 30 minutes. This helps them get crispy.
3. Drain the fries and pat them dry. Toss them in a bowl with olive oil, paprika, salt, and cayenne if you want a spicy twist.
4. Spread the fries out in a single layer on a baking sheet.
5. Bake for 25-30 minutes, flipping them halfway through, until they turn golden brown and crispy.
6. Serve with your favorite dipping sauce.
For an extra crunch, try baking them on a wire rack placed over the baking sheet. If you have leftovers, store them in an airtight container in the fridge for up to three days.
FAQ:
– Are sweet potato fries healthier than regular fries?
Yes! Sweet potatoes provide more vitamins and minerals than regular potatoes. Enjoy this delicious snack without the guilt!
Craving crispy, gluten free salty snack recipes? Baked sweet potato fries hit the spot every time—crunchy on the outside, fluffy inside. Season them to your liking and dip into a zesty sauce for a game-day win.
Baked Sweet Potato Fries
Editor’s Choice
Cosori 9-in-1 TurboBlaze Air Fryer 6 Qt, Premium Ceramic Coating, 90°–45…

Amazon Basics Silicone Rectangular Baking Mat, Non-Stick Reusable Oven B…

Melinda’s Dipping Sauce Gift Set with Ghost Pepper Black Truffle, Buffal…
9. Parmesan Crisps

Looking for a quick snack that satisfies your cravings without the guilt? Parmesan crisps are your perfect solution! These crunchy, cheesy bites are gluten-free and packed with flavor. Enjoy them on their own or sprinkle them on salads and soups for an extra cheesy kick. They’re super easy to make, requiring just two ingredients: parmesan cheese and a baking sheet.
Let’s get started on this delicious treat! Here’s what you need:
Ingredients:
– 1 cup grated parmesan cheese
– Optional: spices like paprika or garlic powder for added flavor
Instructions:
1. Preheat your oven to 400°F (200°C).
2. Line a baking sheet with parchment paper.
3. Scoop tablespoon-sized portions of grated cheese onto the sheet, leaving space between each.
4. Bake for 5-7 minutes, or until they turn golden and bubbly.
5. Allow them to cool on the baking sheet before serving.
Feel free to mix in your favorite herbs or spices before baking. A dash of garlic powder or a sprinkle of paprika can elevate the taste! Just keep an eye on them in the oven to prevent burning.
Storage Tip: These crisps taste best fresh, but you can store any leftovers in an airtight container for a few days.
Now you’ve got a delightful snack ready in just 15 minutes! Perfect for munching during movie night or as a crunchy salad topper. Enjoy every bite of your homemade parmesan crisps!
Parmesan Crisps
Editor’s Choice

Amazon Basics Parchment Paper for Baking, Non-Stick, 90 Sq Ft Roll, 1 Pack


Kamenstein 20 Jar Revolving Countertop Spice Rack with Spices Included, …
10. Spinach and Cheese Stuffed Mushrooms

Discover the irresistible flavor of Spinach and Cheese Stuffed Mushrooms! These delightful bite-sized snacks are perfect for any occasion, from game day to casual gatherings. Not only are they gluten-free, but they also burst with savory goodness. The best part? You can prepare them ahead of time, allowing you to enjoy the festivities without stress.
Imagine warm, cheesy mushrooms fresh out of the oven, ready to impress your guests. You can customize the cheese or spice blend to match your taste, making each batch uniquely yours. It’s a simple yet satisfying treat that everyone will love.
Recipe Overview:
– Servings: 6
– Prep Time: 15 minutes
– Cook Time: 20 minutes
– Total Time: 35 minutes
– Calories: 150 per serving
Ingredients:
– 12 large mushrooms, stems removed
– 1 cup fresh spinach, chopped
– 1/2 cup cream cheese, softened
– 1/2 cup shredded mozzarella cheese
– 1/4 teaspoon garlic powder
– Salt and pepper to taste
Instructions:
1. Preheat your oven to 375°F (190°C).
2. In a bowl, combine the chopped spinach, cream cheese, mozzarella, garlic powder, salt, and pepper. Mix until everything is well blended.
3. Stuff each mushroom cap generously with the mixture.
4. Arrange the stuffed mushrooms on a baking sheet and bake for about 20 minutes, or until they turn golden brown.
5. Serve warm and enjoy this tasty treat!
You can prepare the stuffing a day in advance and store it in the fridge. For an extra burst of flavor, drizzle some balsamic glaze over the mushrooms before serving.
FAQ:
– Can I use other vegetables for the stuffing?
Absolutely! Feel free to mix in bell peppers or onions for a different twist.
These stuffed mushrooms are not only simple but also a delicious way to impress your friends and family. Try them out and watch them disappear!
Spinach and Cheese Stuffed Mushrooms
Editor’s Choice

Kikkoman Panko Style Coating – Natural Flavor, Delicate and Crisp Textur…
Amazon Basics Silicone Rectangular Baking Mat, Non-Stick Reusable Oven B…

Mushroom Plush Toys 12 inch Cute Stuffed Mushroom Pillow Stuffed Toy Bir…
11. Sweet and Savory Trail Mix

Looking for a snack that’s both satisfying and healthy? This sweet and savory trail mix is just what you need. It blends crunchy nuts, seeds, and chewy dried fruit for a delightful bite. You can easily make it your own by adding your favorite ingredients, whether you prefer a hint of spice, a touch of sweetness, or a mix of both.
Prepare this trail mix ahead of time and keep it in an airtight container. It’s perfect for munching during game day or anytime you crave a quick snack. Plus, it’s a much better choice than chips, giving you a nice energy boost without the guilt.
Here’s how to whip up your own sweet and savory trail mix:
Recipe Overview:
– Servings: 8
– Prep Time: 10 minutes
– Cook Time: 0 minutes (no baking required)
– Total Time: 10 minutes
– Calories: 200 per serving
Ingredients:
– 1 cup mixed nuts (like almonds, walnuts, and pecans)
– 1/2 cup pumpkin seeds
– 1/2 cup dried cranberries or raisins
– 1/4 cup dark chocolate chips (optional for a sweet touch)
– 1 teaspoon cinnamon
Instructions:
1. In a large bowl, combine the nuts, pumpkin seeds, dried fruits, and chocolate chips.
2. Sprinkle with cinnamon and mix everything well.
3. Store in an airtight container until you’re ready to snack.
Feel free to get creative! You can add coconut flakes for extra sweetness or adjust the ingredient ratios based on your taste.
FAQ:
– Can I use different nuts?
Absolutely! Choose any nuts you like to make this trail mix your own.
This trail mix is great for any occasion, whether you’re watching a game or just enjoying a cozy night in. It’s a simple way to satisfy your cravings while staying healthy. Enjoy!
Sweet and Savory Trail Mix
Editor’s Choice

Ankou Airtight Food Storage Container Sets with Lids 6Pcs Pop Containers…

Emerald Nuts Mixed Nuts Variety Pack 18ct (1-Pack) , 100-Calorie Individ…

Navitas Organics Cacao Nibs – Unsweetened Dark Chocolate Crunch – Antiox…
12. Buffalo Cauliflower Dip

Buffalo Cauliflower Dip is your new go-to for satisfying snack cravings. Imagine the spicy, tangy flavor of buffalo wings, but in a creamy, dippable form. It’s great for sharing at parties or enjoying during a cozy night in. Pair it with gluten-free crackers, crunchy veggies, or crispy tortilla chips to make every bite burst with flavor.
This dip is not only delicious but also easy to prepare ahead of time. The secret? A smooth blend of cauliflower and cream cheese creates a rich texture, while the buffalo sauce gives it that fiery kick you love. And with just a few simple steps, you’ll have a crowd-pleaser ready in no time.
Here’s how to make it:
Recipe Overview:
– Servings: 6
– Prep Time: 10 minutes
– Cook Time: 20 minutes
– Total Time: 30 minutes
– Calories: 250 per serving
Ingredients:
– 1 head of cauliflower, chopped
– 8 oz cream cheese, softened
– 1/2 cup buffalo sauce
– 1/2 cup shredded cheese (cheddar or mozzarella)
– Optional: chopped green onions for garnish
Instructions:
1. Preheat your oven to 350°F (175°C).
2. Steam the cauliflower until it’s tender. Then, mash or blend it until smooth.
3. In a mixing bowl, combine the mashed cauliflower, cream cheese, buffalo sauce, and shredded cheese.
4. Pour the mixture into a baking dish and bake for 20 minutes or until bubbly.
5. Garnish with green onions and serve warm.
Tips to Enhance Your Dip:
– Adjust the buffalo sauce to control the heat level.
– Serve with fresh veggies for a nutritious twist.
FAQ:
– Can I prepare this dip in advance? Yes! Make it ahead and refrigerate. Just bake it before serving for a warm treat.
With its creamy texture and zesty flavor, this Buffalo Cauliflower Dip is sure to impress. Enjoy a guilt-free snack that feels indulgent yet stays gluten-free and satisfying!
Buffalo Cauliflower Dip
Editor’s Choice

Absolutely Gluten Free Original Flatbread, 5.25oz (6 Pack) | Grain Free …

Buffalo Wild Wings Medium Buffalo Sauce, 12 fl. oz., Perfect Dipping Sau…

Duncan Hines Creamy Cream Cheese Frosting, 16 oz (Pack of 2)
13. Roasted Garlic Hummus

Roasted garlic hummus is not just a dip; it’s a creamy delight that elevates your snacking experience. This flavor-packed treat pairs perfectly with fresh veggies, gluten-free pita chips, or crunchy crackers. Best of all, hummus is naturally gluten-free and loaded with protein, making it a wholesome snack you can feel good about.
Making hummus at home is a breeze! By roasting garlic, you unlock a sweetness that transforms this dip into something truly special. It’s easy to adjust the flavors, ensuring every batch is just how you like it. Whether you’re hosting game day or just need a quick snack, this roasted garlic hummus will be the star of the show.
Recipe Overview:
– Servings: 6
– Prep Time: 10 minutes
– Cook Time: 30 minutes (for garlic roasting)
– Total Time: 40 minutes
– Calories: 150 per serving
Ingredients:
– 1 can chickpeas, drained
– 1/4 cup tahini
– 1/4 cup olive oil
– 4 cloves roasted garlic
– Juice of 1 lemon
– Salt to taste
Instructions:
1. Preheat your oven to 400°F (200°C). Wrap the garlic cloves in foil and roast for 30 minutes until soft and sweet.
2. In a food processor, add the chickpeas, tahini, olive oil, roasted garlic, lemon juice, and salt.
3. Blend everything until smooth. If it’s too thick, add a bit of water to get your desired consistency.
4. Serve your hummus with colorful veggies or gluten-free crackers.
Pro Tips:
– Drizzle a little olive oil on top before serving for extra richness.
– Store any leftovers in the fridge for up to a week, but good luck keeping it around that long!
FAQ:
Can I use raw garlic?
You can, but be aware it has a sharper flavor. Adjust the amount to suit your taste!
Enjoy this roasted garlic hummus, and watch your snack time become something extraordinary!
Roasted Garlic Hummus
Editor’s Choice

Hamilton Beach Food Processor & Vegetable Chopper for Slicing, Shredding…

365 by Whole Foods Market, Sea Salt Pita Chips, 18 Ounce (Pack of 4)

365 by Whole Foods Market, Organic Tahini, 16 Ounce
14. Baked Spinach and Feta Dip

Get ready to indulge in a warm, creamy delight with this Baked Spinach and Feta Dip! If you’re craving something cheesy and savory, this dip will hit the spot. It’s perfect for gatherings or a cozy night in. Pair it with gluten-free crackers or crusty bread for a snack that everyone will love.
This dip combines fresh spinach with tangy feta cheese, creating a flavor-packed treat. You can whip it up quickly, and it’s an excellent make-ahead option. Your friends will keep coming back for more, so be prepared to share!
Here’s how to make it:
Recipe Overview:
– Servings: 6
– Prep Time: 15 minutes
– Cook Time: 25 minutes
– Total Time: 40 minutes
– Calories: 200 per serving
Ingredients:
– 1 cup spinach, chopped
– 8 oz cream cheese, softened
– 1/2 cup feta cheese, crumbled
– 1/2 cup sour cream
– 1 teaspoon garlic powder
– Salt and pepper to taste
Instructions:
1. Preheat your oven to 350°F (175°C).
2. In a mixing bowl, combine the chopped spinach, cream cheese, feta, sour cream, garlic powder, salt, and pepper. Mix until smooth.
3. Spread the mixture into a baking dish, smoothing the top.
4. Bake for 25 minutes, or until it’s bubbly and golden on top.
5. Serve hot with gluten-free crackers or sliced bread.
Want to add a twist? Toss in some sun-dried tomatoes for an extra burst of flavor! And remember to keep an eye on the dip as it bakes to avoid burning.
FAQ:
– Can I use fresh spinach instead of frozen? Yes! Just sauté it first to reduce moisture.
This Baked Spinach and Feta Dip is sure to become your go-to recipe for any occasion. Enjoy every cheesy bite!
Did you know 80% of game-day guests reach for dips first? For gluten free salty snack recipes, this baked spinach and feta dip delivers a warm, crowd-pleasing finish in under 15 minutes.
Baked Spinach and Feta Dip
Editor’s Choice

Milton’s Gluten Free Crackers, Crispy Sea Salt – Non-GMO Project Verifie…

DOWAN Casserole Dish, 9×13 Ceramic Baking Dish, Large Lasagna Pan Deep f…
15. Crispy Coconut Shrimp

Crispy coconut shrimp are more than just a snack; they’re a game day sensation. Imagine biting into juicy shrimp coated in a sweet, crunchy coconut layer. The combination of flavors is irresistible, making them a perfect addition to any gathering. Best of all, you can bake these shrimp instead of frying them, keeping them lighter without sacrificing taste. Pair them with a sweet chili dipping sauce for a delightful twist.
Ready to whip up these tasty morsels? Here’s what you need:
Ingredients:
– 1 lb large shrimp, peeled and deveined
– 1/2 cup gluten-free breadcrumbs
– 1/2 cup shredded coconut
– 2 eggs, beaten
– 1 teaspoon salt
– Optional: sweet chili sauce for dipping
Instructions:
1. Preheat your oven to 400°F (200°C).
2. In a bowl, combine the gluten-free breadcrumbs and shredded coconut.
3. Dip each shrimp in the beaten eggs, then coat thoroughly with the breadcrumb mixture.
4. Arrange the coated shrimp on a baking sheet lined with parchment paper.
5. Bake for about 20 minutes, or until they turn golden and crispy.
6. Serve hot with sweet chili sauce for dipping.
For an extra kick, sprinkle some garlic powder or cayenne into the breadcrumb mix. Make sure each shrimp is well-coated for that perfect crunch you crave.
Tips:
– Use frozen shrimp if you want; just make sure to thaw them completely before cooking.
– Adjust the seasoning to your taste—feel free to get creative!
– These shrimp are great for parties, game nights, or simply as a delicious snack at home.
Get ready to impress your friends and family with this easy and delightful recipe. Enjoy the crispy goodness!
Crispy Coconut Shrimp
Editor’s Choice
Kikkoman Panko Style Coating – Natural Flavor, Delicate and Crisp Textur…

365 by Whole Foods Market, Organic Shredded Coconut, 8 Ounce

16. Spicy Roasted Nuts

Spicy roasted nuts are the perfect solution for your snacking needs. These crunchy bites deliver a punch of flavor in every handful. Not only are they easy to whip up, but they also provide a healthy dose of protein, making them an excellent choice for game day or any gathering.
The beauty of this recipe lies in its versatility. You can choose your favorite nuts—such as almonds, cashews, or pecans—and adjust the spice level to suit your taste. Imagine munching on these spicy delights while cheering for your team! Plus, you can prepare them ahead of time, so they’re always ready when cravings hit.
Here’s a simple recipe to get you started:
Recipe Overview:
– Servings: 6
– Prep Time: 10 minutes
– Cook Time: 20 minutes
– Total Time: 30 minutes
– Calories: 200 per serving
Ingredients:
– 2 cups mixed nuts
– 1 tablespoon olive oil
– 1 teaspoon cayenne pepper (adjust to taste)
– 1 teaspoon garlic powder
– 1/2 teaspoon salt
Instructions:
1. Preheat your oven to 350°F (175°C).
2. In a mixing bowl, combine the nuts, olive oil, cayenne pepper, garlic powder, and salt. Stir well to coat.
3. Spread the nut mixture evenly on a baking sheet.
4. Roast in the oven for 20 minutes, stirring halfway through, until the nuts are golden and fragrant.
5. Allow them to cool before serving.
Store any leftovers in an airtight container. They make a fantastic snack for unexpected guests or for your own late-night cravings.
Tips:
– Experiment with different spices like smoked paprika or cumin for unique flavors.
– Mix sweet and spicy seasonings for an exciting twist.
– Use raw nuts for a fresher taste; just adjust roast time as needed.
– Try adding herbs like rosemary for a fragrant touch.
These spicy roasted nuts will quickly become your favorite snack. Enjoy them at your next gathering or simply as a treat for yourself!
Spicy Roasted Nuts
Editor’s Choice

Kirkland Signature QNKDQK Extra Fancy Unsalted Mixed Nuts 2.5 (LB), 2 Pa…

Amazon Brand – Happy Belly Cayenne Red Pepper, Ground, 2.75 Ounce (Pack …

Rubbermaid Brilliance Pantry Airtight Food Storage Container, BPA-Free 7…
17. Jalapeño Poppers

Jalapeño poppers are more than just a snack; they’re a crowd-pleaser! Perfect for game day or any get-together, these gluten-free delights pack a punch of flavor. Imagine biting into a spicy jalapeño filled with creamy cheese goodness. It’s a flavor explosion that you and your friends won’t forget!
To make them, you’ll need fresh jalapeños and a rich cream cheese filling. Add spices for an extra kick, and if you like, sprinkle on some crispy bacon bits. Whether you’re hosting a party or just craving a tasty treat, jalapeño poppers are sure to impress.
Recipe Overview:
– Servings: 4
– Prep Time: 15 minutes
– Cook Time: 20 minutes
– Total Time: 35 minutes
– Calories: 250 per serving
Ingredients:
– 12 jalapeños, halved and seeds removed
– 8 oz cream cheese, softened
– 1/2 cup shredded cheese (like cheddar or mozzarella)
– 1 teaspoon garlic powder
– Optional: bacon bits for topping
Instructions:
1. Preheat your oven to 375°F (190°C).
2. In a mixing bowl, blend cream cheese, shredded cheese, garlic powder, and bacon bits if you’re using them.
3. Carefully stuff the jalapeño halves with the cheese mixture.
4. Arrange them on a baking sheet and bake for 20 minutes until they are bubbly and golden.
5. Let them cool slightly before serving.
These poppers are fantastic served with ranch dressing for dipping. If you want a milder option, swap jalapeños for mini bell peppers.
FAQ:
– Can I make these ahead of time?
Yes! Prepare them a day in advance and bake just before your event for fresh, warm snacks.
Enjoy these jalapeño poppers at your next gathering, and watch them disappear fast!
Jalapeño Poppers
Editor’s Choice

Aleia’s Gluten Free Plain Bread Crumbs – 13oz (1 Pack) – Breading for Ch…
Good Culture Organic Classic Cottage Cheese, 16 oz
18. Roasted Sweet Potato and Black Bean Taquitos

These roasted sweet potato and black bean taquitos are a delightful gluten-free snack that satisfies your cravings. They are crunchy, flavorful, and perfect for game day or any gathering. Imagine biting into a crispy taquito filled with warm, savory sweet potatoes and hearty black beans. With each bite, you’ll enjoy a burst of flavor that makes you feel good about your snack choice.
What makes these taquitos even better? They are healthy! Packed with nutrients, they are a fantastic alternative to traditional snacks that are often high in calories and low in nutrition. Pair them with fresh salsa or creamy guacamole, and you’ve got a snack everyone will love.
Here’s how to make them:
Ingredients:
– 2 sweet potatoes, peeled and diced
– 1 can black beans, rinsed and drained
– 1 teaspoon cumin
– Salt to taste
– Corn tortillas
Instructions:
1. Preheat your oven to 425°F (220°C).
2. Toss the diced sweet potatoes with cumin and salt on a baking sheet. Roast for 25 minutes until tender.
3. Once roasted, mash the sweet potatoes in a bowl and mix in the black beans.
4. Fill each corn tortilla with the mixture and roll them tightly.
5. Place the taquitos seam-side down on a baking sheet.
6. Bake for 15 minutes until they turn golden and crispy.
7. Serve them warm with salsa or guacamole on the side!
Want to add a fresh twist? Add chopped cilantro to the filling for extra flavor! And remember to keep an eye on them while baking to avoid burning.
FAQ:
– Can I freeze these taquitos?
Yes, freeze them unbaked for the best results later on!
Now you’re ready to enjoy these tasty taquitos anytime. They’re sure to impress your guests and keep you satisfied. Happy snacking!
Roasted Sweet Potato and Black Bean Taquitos
Editor’s Choice

365 by Whole Foods Market Flour Tortillas, 10.7 OZ

365 by Whole Foods Market, Organic Unsalted Black Beans, 13.4 Ounce

Amazon Grocery, Ground Cumin, 2.6 Oz (Previously Happy Belly, Packaging …
19. Garlic Parmesan Popcorn

Snack time just got a delicious upgrade with Garlic Parmesan Popcorn! This twist on traditional popcorn transforms your movie night or game day into a flavor-packed experience. Imagine fluffy popcorn coated in savory garlic and rich parmesan. It’s light, it’s crunchy, and it’s a fantastic gluten-free option that you can whip up in just 15 minutes.
Not only is this popcorn quick to make, but it’s also a healthier alternative to many store-bought snacks filled with additives. You’ll have a tasty treat that everyone will enjoy, perfect for sharing or keeping all to yourself. Let’s dive into the recipe, so you can enjoy this scrumptious snack in no time!
Recipe Overview:
– Servings: 4
– Prep Time: 5 minutes
– Cook Time: 10 minutes
– Total Time: 15 minutes
– Calories: 150 per serving
Ingredients:
– 1/2 cup popcorn kernels
– 2 tablespoons olive oil
– 1/4 cup grated parmesan cheese
– 1 teaspoon garlic powder
– Salt to taste
Instructions:
1. Heat the olive oil in a large pot over medium heat.
2. Add the popcorn kernels and cover the pot with a lid.
3. When the popping slows down, take the pot off the heat.
4. Pour the popcorn into a large bowl. Then, sprinkle the parmesan cheese, garlic powder, and salt over it.
5. Toss the popcorn until every piece is evenly coated.
For an extra punch of flavor, you can drizzle melted butter over the popcorn before serving. If you have a popcorn machine, use it for an even easier experience.
Frequently Asked Questions:
– Can I try different flavors?
Absolutely! Feel free to experiment with spices like chili powder or nutritional yeast for a unique twist.
Now you have a quick recipe that’s sure to be a hit. Grab your ingredients and enjoy this tasty Garlic Parmesan Popcorn at your next gathering or cozy night in!
Garlic Parmesan Popcorn
Editor’s Choice

DASH Hot Air Popcorn Popper Maker with Measuring Cup to Portion Popping …

20. Creamy Avocado Dip

Craving a delicious dip that’s both creamy and healthy? Look no further than this Creamy Avocado Dip. It’s a fresh twist on traditional dips, bursting with flavor and packed with nutrients. Perfect for game day or a casual gathering, this gluten-free dip pairs beautifully with crunchy tortilla chips or vibrant fresh veggies.
Imagine ripe avocados, zesty lime, and a hint of garlic all coming together in minutes. With just a few simple ingredients, you can whip up a crowd-pleaser that adds a delightful green touch to your snack table. Friends and family won’t stop raving about it!
Here’s how to make it:
Recipe Overview:
– Servings: 4
– Prep Time: 5 minutes
– Cook Time: 0 minutes
– Total Time: 5 minutes
– Calories: 200 per serving
Ingredients:
– 2 ripe avocados
– 1 lime, juiced
– 1 clove garlic, minced
– Salt to taste
– Optional: chopped cilantro for garnish
Instructions:
1. In a bowl, mash the avocados with lime juice, minced garlic, and salt until smooth.
2. Taste and adjust seasoning as needed. If you like, sprinkle chopped cilantro on top for a fresh kick.
3. Serve with tortilla chips or fresh veggies for dipping.
Storage Tip: To keep your dip looking fresh, press plastic wrap directly against the surface before storing it.
Flavor Boost: Want to jazz it up? Add some chopped tomatoes for extra flavor and texture!
FAQ:
– Can I make this dip ahead of time?
Yes, but it’s best enjoyed fresh for maximum flavor!
This easy recipe is not just a treat; it’s a nutritious option that satisfies your salty snack cravings. Enjoy your creamy avocado dip and watch it disappear in no time!
Creamy Avocado Dip
Editor’s Choice

Siete Tortilla Chips | Grain free | Gluten Free Chips | Paleo & Vegan Sn…

Umite Chef Mixing Bowls with Airtight Lids Set, 8PCS Stainless Steel Kha…
21. Coconut Flour Pancakes

Craving something delicious that’s also gluten-free? Look no further than these scrumptious Coconut Flour Pancakes! They’re not just for breakfast; you can enjoy them as a savory snack any time of day. Imagine fluffy pancakes topped with melted cheese or your favorite herb spread. These tasty treats offer a delightful twist for game day gatherings or casual get-togethers.
Plus, they’re super quick to make! You can whip them up in advance and focus on having fun instead of being stuck in the kitchen. Your guests will be wowed by these pancakes when you serve them hot with savory toppings. Trust me, they won’t last long!
Here’s a quick recipe overview:
– Servings: 4
– Prep Time: 10 minutes
– Cook Time: 15 minutes
– Total Time: 25 minutes
– Calories: 150 per serving
Ingredients:
– 1/2 cup coconut flour
– 4 eggs
– 1/2 cup milk (dairy or non-dairy)
– 1/4 teaspoon salt
– Optional: cheese or herbs for topping
Instructions:
1. In a mixing bowl, combine coconut flour, eggs, milk, and salt until the batter is smooth.
2. Preheat a skillet over medium heat and lightly grease it.
3. Pour 1/4 cup of batter onto the skillet for each pancake.
4. Cook for 2-3 minutes per side until golden brown.
5. Top with your choice of cheese or fresh herbs and serve warm.
Feel free to adjust the thickness of the batter by adding more milk. You can also experiment with different toppings for varied flavors.
FAQ:
– Can I use regular flour instead?
No, coconut flour behaves differently and requires specific ratios. Stick with coconut flour for the best results!
Enjoy these pancakes anytime you want a tasty, gluten-free snack that everyone will love!
Coconut Flour Pancakes
Editor’s Choice


CAROTE Nonstick Frying Pan Skillet,Non Stick Granite Fry Pan Egg Pan Ome…

M.G. PAPPAS High Polyphenol Tuscan Herb Infused Olive Oil Extra Virgin -…
22. Savory Bacon-Wrapped Dates

Indulge in the delightful experience of savory bacon-wrapped dates. These tasty bites combine the sweet richness of dates with the savory crunch of bacon, creating a flavor explosion that’s hard to resist. They’re not just easy to make; they also vanish quickly at gatherings. Imagine serving these at your next game day party. The crispy bacon enveloping the soft, sweet dates will have everyone reaching for more.
You can prepare these ahead of time, making them a stress-free option for your next event. Pair them with a tangy dipping sauce for an added kick. The combination of flavors and textures will keep your guests talking long after the last bite.
Recipe Overview:
– Servings: 4
– Prep Time: 15 minutes
– Cook Time: 20 minutes
– Total Time: 35 minutes
– Calories: 200 per serving
Ingredients:
– 1 lb dates, pitted
– 8 slices of bacon, cut in half
– Optional: balsamic glaze for drizzling
Instructions:
1. Preheat your oven to 400°F (200°C).
2. Take each date and wrap it with half a slice of bacon, securing it with a toothpick.
3. Arrange the wrapped dates on a baking sheet. Bake for about 20 minutes, or until the bacon turns crispy.
4. For an extra touch, drizzle with balsamic glaze just before serving.
Feel free to use Medjool dates for added sweetness and tenderness. You might even try different types of bacon, like maple, for a unique twist.
FAQ:
– Can I make these in advance?
Absolutely! Prepare them ahead of time and just reheat before serving.
These bacon-wrapped dates are perfect for any gathering, offering a blend of sweet and salty that everyone loves. Enjoy making these crowd-pleasers!
Savory Bacon-Wrapped Dates
Editor’s Choice


Terrasoul Superfoods Organic Medjool Dates, 2 Lbs – Soft Chewy Texture |…

600 Count Bamboo Toothpicks for Teeth Cleaning, Appetizer, Olive, Barbec…
23. Eggplant Chips

Eggplant chips offer a tasty twist on traditional snacks. If you’re craving something crispy and healthy, these chips are your answer. They are gluten-free and easy to make, making them perfect for gatherings or a quiet night in. Plus, you can customize the flavors to suit your taste!
Imagine serving these delightful chips at your next game day party. With a few simple ingredients, you’ll impress your guests with a nutritious alternative to potato chips. They pair wonderfully with your favorite dips, adding a unique touch to your snack table.
Here’s how to make them:
Recipe Overview:
– Servings: 4
– Prep Time: 15 minutes
– Cook Time: 30 minutes
– Total Time: 45 minutes
– Calories: 100 per serving
Ingredients:
– 1 large eggplant, sliced thinly
– 2 tablespoons olive oil
– 1 teaspoon salt
– Optional: garlic powder or your favorite seasoning
Instructions:
1. Preheat your oven to 225°F (110°C).
2. Lightly sprinkle salt on the eggplant slices and let them sit for 10 minutes to draw out moisture.
3. Pat the slices dry, then toss them with olive oil and any extra seasonings you like.
4. Place the slices in a single layer on a baking sheet.
5. Bake for 30 minutes, flipping halfway, until they turn crispy.
6. Enjoy with your favorite dips!
For an extra crunch, leave them in the oven to cool after baking. Store any leftovers in an airtight container for up to three days.
FAQ:
– Can I fry these instead?
Yes! Frying them will give you a different, crunchier texture.
Now you have a delicious, gluten-free snack that satisfies your cravings and keeps your guests coming back for more!
Eggplant Chips
Editor’s Choice
Amazon Basics Silicone Rectangular Baking Mat, Non-Stick Reusable Oven B…
OXO Good Grips Handheld Mandoline Slicer for Kitchen, Adjustable Vegetab…
Cosori 9-in-1 TurboBlaze Air Fryer 6 Qt, Premium Ceramic Coating, 90°–45…
24. Onion Rings

Craving a crunchy snack that’s also gluten-free? Look no further than these baked onion rings! They pack all the flavor of the classic dish but come with a healthier twist. Imagine biting into a crispy, golden ring that’s perfectly seasoned. Serve them up on game day or during a cozy movie night, and watch everyone smile as they dive in.
These onion rings are super easy to make. You’ll love how quickly they come together. Plus, you can customize the flavors to your liking by adding spices to the breadcrumb mixture. Pair them with your favorite dipping sauces for an extra kick!
Here’s a simple recipe to get you started:
Recipe Overview:
– Servings: 4
– Prep Time: 10 minutes
– Cook Time: 30 minutes
– Total Time: 40 minutes
– Calories: 150 per serving
Ingredients:
– 2 large onions, sliced into rings
– 1 cup gluten-free breadcrumbs
– 1/2 cup gluten-free flour
– 2 eggs, beaten
– 1 teaspoon garlic powder
– Salt and pepper to taste
Instructions:
1. Preheat the oven to 400°F (200°C).
2. Dip each onion ring in the gluten-free flour, then the beaten eggs, and finally coat with gluten-free breadcrumbs.
3. Arrange the coated rings on a baking sheet, making sure they don’t touch, to keep them crispy.
4. Bake for 30 minutes or until they turn golden brown and crispy.
5. Serve hot with your choice of dipping sauces.
Tips:
– Add your favorite spices to the breadcrumbs for an extra flavor boost.
– Be sure to space out the rings on the baking sheet to prevent steaming.
FAQ:
– Can I fry these instead?
Yes, frying will give them an even crispier texture!
These baked onion rings are not just tasty; they’re also a hit with friends and family. Enjoy a guilt-free snack that satisfies your cravings without the gluten. Happy snacking!
Onion Rings
Editor’s Choice
Kikkoman Panko Style Coating – Natural Flavor, Delicate and Crisp Textur…
King Arthur, Measure for Measure Flour, Certified Gluten-Free, Non-GMO P…

ROTTAY Baking Sheet with Rack Set (2 Pans + 2 Racks), Stainless Steel Co…
25. Beet Chips

Get ready to enjoy a snack that’s as colorful as it is delicious—beet chips! These crunchy treats not only brighten up your plate but also pack a powerful nutritional punch. With their sweet and earthy flavor, beet chips are a fantastic alternative to traditional chips. Whether you dip them into your favorite sauce or munch on them straight from the bowl, they’re sure to impress your friends and family.
Making beet chips is easy and fun. You can keep it simple with just salt, or mix it up with spices like garlic powder or paprika for a zesty kick. Plus, they are a great way to satisfy those crunchy cravings while staying gluten-free.
Recipe Overview:
– Servings: 4
– Prep Time: 15 minutes
– Cook Time: 30 minutes
– Total Time: 45 minutes
– Calories: 120 per serving
Ingredients:
– 2 large beets, thinly sliced
– 2 tablespoons olive oil
– Salt, to taste
– Optional: garlic powder or paprika for extra flavor
Instructions:
1. Preheat your oven to 350°F (175°C).
2. In a bowl, toss the beet slices with olive oil and your choice of seasoning.
3. Spread the slices in a single layer on a baking sheet.
4. Bake for 30 minutes, flipping them halfway through, until they are crispy.
5. Let them cool before storing in an airtight container.
Tips:
– Use a mandoline for even slices to ensure consistent cooking.
– Store in an airtight container for up to a week for maximum freshness.
FAQ:
– Can I use red beets instead of golden?
Absolutely! Both types work well, so choose your favorite.
These beet chips not only make a great snack but also serve as a healthy option for gatherings. They’re easy to prepare, and your guests will love the unique flavor and vibrant color. Enjoy snacking guilt-free!
Beet Chips
Editor’s Choice
OXO Good Grips Handheld Mandoline Slicer for Kitchen, Adjustable Vegetab…
Airtight Food Storage Containers with Lids, Vtopmart 24 pcs Plastic Kitc…

YARRAMATE 16oz/470ml Glass Olive Oil Sprayer for Cooking with Stickers, …
26. Savory Cheese and Herb Muffins

If you’re looking for a warm and cheesy snack that stands out at your next gathering, savory cheese and herb muffins are the perfect choice. These gluten-free delights are fluffy, flavorful, and a great way to satisfy snack cravings. Imagine biting into a warm muffin, the cheese melting in your mouth, paired with delightful herbs. They’re not just tasty; they add a comforting touch to your snack spread, making them a hit with friends and family.
You can prepare these muffins in advance, making them a smart option for busy days or game nights. Simply reheat them to serve, and you’re ready to impress! Eat them alone or dip them in your favorite sauce for an extra kick. Here’s how to whip them up:
Recipe Overview:
– Servings: 12
– Prep Time: 15 minutes
– Cook Time: 25 minutes
– Total Time: 40 minutes
– Calories: 180 per serving
Ingredients:
– 1 cup gluten-free flour
– 1 cup shredded cheese (cheddar or mozzarella)
– 1/2 cup milk (dairy or non-dairy)
– 2 eggs
– 1 teaspoon dried herbs (like thyme or rosemary)
– Salt and pepper to taste
Instructions:
1. Preheat your oven to 375°F (190°C).
2. In a mixing bowl, combine the gluten-free flour, shredded cheese, milk, eggs, herbs, salt, and pepper. Stir until everything blends well.
3. Pour the mixture into a greased muffin tin, filling each cup about three-quarters full.
4. Bake for 25 minutes or until the tops turn golden and a toothpick inserted comes out clean.
5. Allow them to cool for a few minutes before taking them out of the tin.
For an extra flavor boost, consider adding chopped sun-dried tomatoes or olives into the batter. Serve them warm with butter or a tasty dip for even more enjoyment!
FAQ:
– Can I freeze these muffins?
Yes, you can freeze them for up to a month. Just thaw and reheat when you’re ready to enjoy!
Savory Cheese and Herb Muffins
Editor’s Choice
King Arthur Measure for Measure Gluten-Free Flour: All-Purpose 1:1 Subst…

365 by Whole Foods Market Shredded Mexican Blend, 8 OZ

2Pack Silicone Muffin Pan for Baking with Metal Reinforced Frame, 12 Cup…
27. Crispy Tofu Bites

Crispy tofu bites are the ultimate snack when you’re craving something crunchy yet wholesome. These little gems deliver a satisfying crunch on the outside while staying soft and flavorful on the inside. Whether you’re a tofu aficionado or just curious about plant-based snacks, these bites are sure to impress your taste buds. They’re perfect for dunking in your favorite sauces or enjoying solo!
Let’s get to the recipe so you can whip these up in no time. Here’s what you’ll need:
Recipe Overview:
– Servings: 4
– Prep Time: 15 minutes
– Cook Time: 25 minutes
– Total Time: 40 minutes
– Calories: 120 per serving
Ingredients:
– 1 block firm tofu, pressed and cubed
– 2 tablespoons cornstarch
– 2 tablespoons olive oil
– 1 teaspoon garlic powder
– Salt and pepper to taste
Instructions:
1. Preheat your oven to 400°F (200°C).
2. In a mixing bowl, toss the cubed tofu with cornstarch, olive oil, garlic powder, salt, and pepper until well-coated.
3. Spread the tofu cubes on a baking sheet in a single layer for even cooking.
4. Bake for 25 minutes, flipping halfway through, until they turn golden and crispy.
5. Serve warm with your favorite dipping sauce, like sweet chili or peanut sauce for a flavor blast!
For an extra crunch, let the tofu sit for a few minutes after baking before serving. This small step makes a big difference!
FAQ:
– Can I use silken tofu?
No, stick to firm tofu for the best texture.
These crispy tofu bites are not just a snack; they’re a conversation starter. They are easy to make and perfect for sharing at parties or enjoying during a cozy night in. Enjoy every bite!
Crispy Tofu Bites
Editor’s Choice

365 Everyday Value, Organic Tofu Extra Firm, 14 oz

Earthborn Elements Corn Starch 2 Gallon Bucket, Thickening Agent, Cookin…
Pompeian Robust Extra Virgin Olive Oil, Contains Polyphenols, First Cold…
Conclusion

These 27 gluten-free salty snack recipes are guaranteed to make your game day both fun and flavorful. With options ranging from crispy chips to savory dips, there’s something for everyone to enjoy.
Don’t hesitate to mix and match these recipes to create the ultimate snack spread that caters to all tastes and dietary needs. Invite friends over, enjoy the game, and indulge in these delicious, easy-to-make gluten free snacks!
Note: We aim to provide accurate product links, but some may occasionally expire or become unavailable. If this happens, please search directly on Amazon for the product or a suitable alternative.
This post contains Amazon affiliate links, meaning I may earn a small commission if you purchase through my links, at no extra cost to you.
Frequently Asked Questions
What are some easy gluten free salty snack recipes I can make for game day?
Game day snacking can be fun and gluten-free! You can whip up some easy gluten free salty snack recipes like cheesy popcorn, savory roasted chickpeas, or gluten-free nacho cheese dip. Each of these snacks is simple to prepare and sure to satisfy your cravings while keeping everyone at the party happy!
Are gluten free snacks healthy or just a trend?
Many people wonder about the healthiness of gluten free snacks. The truth is, gluten-free doesn’t automatically mean healthy. You can certainly find nutritious options, like veggie chips or homemade nut mixes, that are both gluten-free and beneficial. Always check the ingredients to ensure you’re choosing healthy options, whether they’re gluten-free or not!
Can I use regular recipes to make gluten free party snacks?
Absolutely! You can adapt many traditional recipes to create gluten free party snacks. Just swap out regular flour for gluten-free alternatives like almond flour or coconut flour. With a bit of creativity, you can turn beloved classics into delicious gluten-free versions that everyone will enjoy!
What are some popular savory gluten free treats for gatherings?
For gatherings, savory gluten free treats are a hit! Think about serving up stuffed mushrooms, gluten-free spinach and cheese pastries, or crispy zucchini fries. These snacks not only cater to gluten-free diets but are also crowd-pleasers that your guests will rave about!
How can I ensure my gluten free snacks are truly gluten free?
To ensure your gluten free snacks are truly gluten-free, always check labels for gluten-containing ingredients like wheat, barley, and rye. Look for products certified as gluten-free, and be cautious about cross-contamination during preparation. With a little diligence, you can enjoy delicious snacks without worry!
Related Topics
gluten free snacks
savory snacks
healthy party snacks
easy snack recipes
game day treats
quick gluten free
appetizer recipes
gluten free munchies
kid-friendly snacks
simple savory treats
gluten free appetizers